The military push-up is the strict version of the push-up. Tucked elbows, aligned body, full range, zero cheating. Where the standard push-up allows a wide stance and 45° elbows, the military push-up tightens everything. The result: the triceps take over as the main mover, not the chest.
This is the push-up the military uses as a physical test standard. Not for its comfort, but because it leaves no room for compensation. Every rep counts, every rep is identical.
Why do military push-ups?
Standard push-ups target the chest primarily. Military push-ups flip the balance: the triceps become the prime mover, the chest steps into support. This shift comes down to hand and elbow placement.
In standard push-ups, hands are 1.25× shoulder width apart and elbows flare at 45°. In military push-ups, hands narrow to shoulder width and elbows stay tucked against the body. This angle change completely shifts the effort distribution.
The muscles worked:
Triceps (prime mover). All three heads of the triceps work through their full range. The tucked elbow position maximises their recruitment. It is the most effective bodyweight exercise for triceps after dips.
Anterior deltoids (secondary mover). The front shoulders stabilise and push. The tighter the elbows, the more the delts drive the press.
Chest (reduced recruitment). The pec major works less than in a standard push-up. The stretch range is reduced by the tight position. The chest assists without dominating.
Core (stabiliser). The abs and lower back maintain body alignment throughout the movement. The military push-up tolerates no compensation: if your core lets go, your form breaks immediately.
In calisthenics, the strict form of the military push-up has a direct benefit: it builds the tucked-elbow pressing strength that transfers to dips and advanced push-up variations. Athletes who only do wide standard push-ups often struggle to move to dips. The military push-up bridges that gap.
How to do a military push-up: step-by-step form
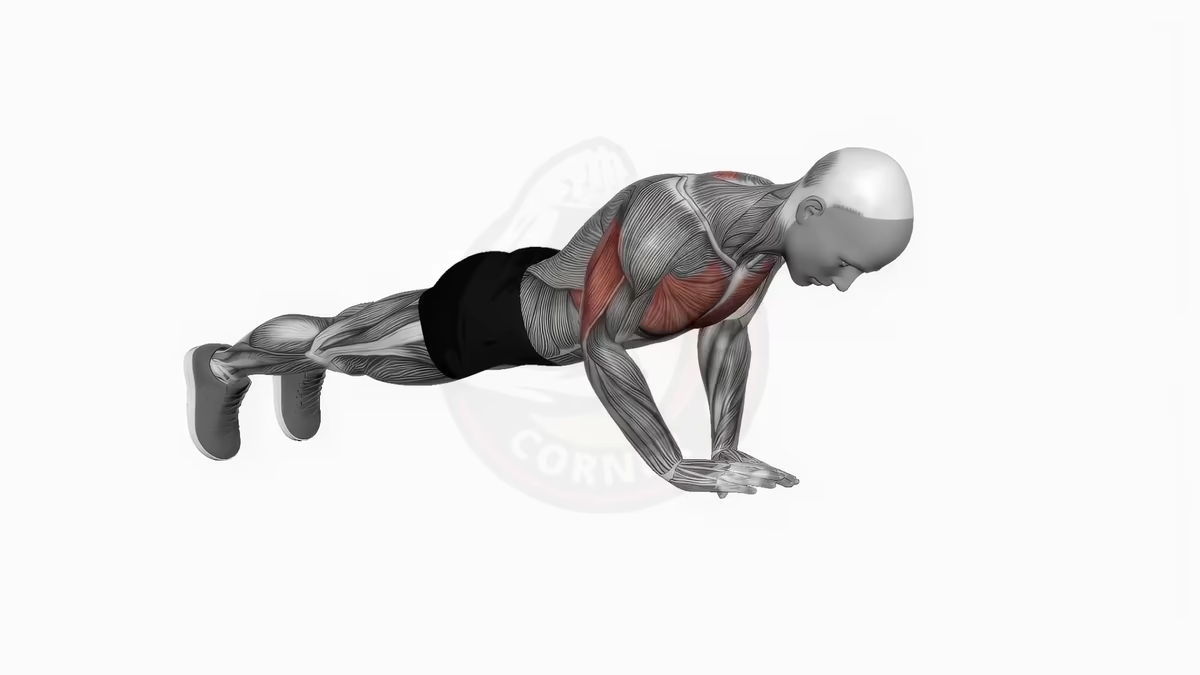
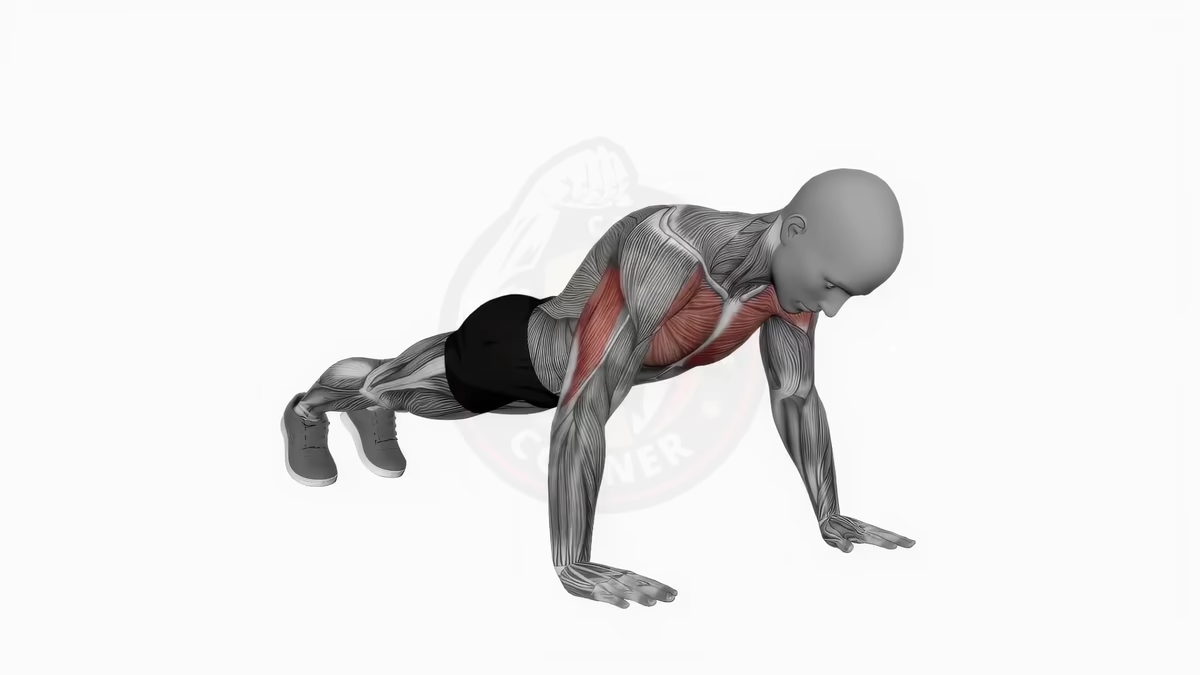
Starting position. Hands on the floor, directly under the shoulders or slightly narrower. Fingers pointing forward. Arms extended. Body aligned head to heels: hips neither raised nor sagging. Feet together or slightly apart (hip width max). Abs braced, glutes squeezed.
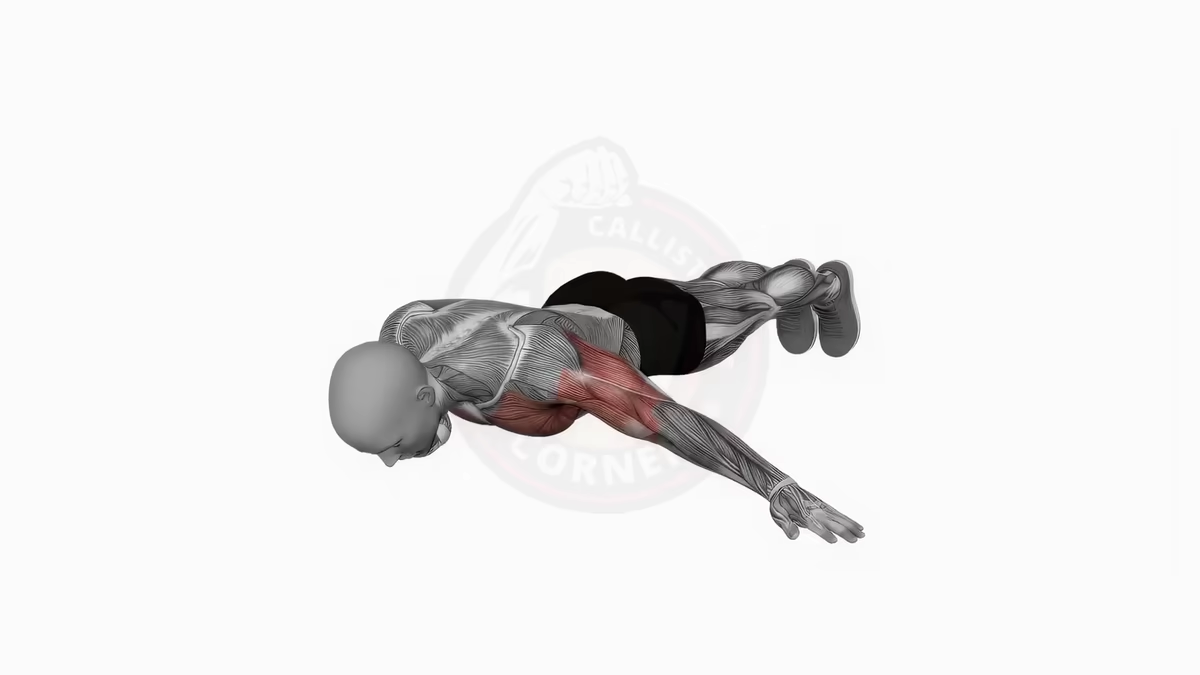
Descent. Bend the elbows keeping them along the body. They move backward, not outward. Descend slowly (2-3 seconds) until your chest grazes the floor. The lower body does not move. Your elbows form an angle under 20° with your torso at the bottom.
Return. Push up explosively by extending the arms. The elbows stay in the same plane as during the descent, no flaring. Lock the arms at the top without hyperextension. The body stays braced from start to finish.
Breathing. Inhale on the descent, exhale on the push. Never hold your breath.
Key check. If your elbows flare more than 20° from the body, you are doing a standard push-up, not a military push-up. The only reliable indicator: your elbows should graze your ribs throughout the movement.
Mistakes to avoid
Elbows flaring out is the most common mistake. As soon as fatigue hits, elbows go sideways to recruit the chest as backup. At that point the exercise loses its point: you are doing a sloppy standard push-up instead of a military push-up. Stop the set as soon as your elbows flare rather than finishing with compensation.
Sagging hips turn the push-up into a lumbar extension. The back arches, the core stops working, and the lower back takes a load it should not carry. If you feel your hips drop before your chest, squeeze your glutes and abs harder. If that is not enough, reduce the reps.
Half reps are tempting because the bottom of the movement is the hardest part (the triceps are maximally stretched). Going halfway is dodging the difficulty. Every rep should go all the way down, chest brushing the floor. 6 full reps beat 12 half reps.
A dropped head is a reflex to “cheat” the distance. Focus your gaze on a point on the floor 30 cm in front of your hands. The neck stays aligned with the spine, neither raised nor dropped.
Variations and progressions
Easier (if you cannot hold 5 strict reps):
Military push-ups on the knees. Same hand and elbow placement, but knees on the floor. You reduce the load by roughly 40%. Aim for 3×10 before moving to full military push-ups.
Incline military push-ups. Hands on a bench, step or wall. The steeper the incline, the easier it is. Gradually lower the angle week by week.
Harder:
Slow tempo. 4-second descent, 1-second pause at the bottom, 2-second return. Time under tension triples. 8 reps at slow tempo match 15 normal reps in difficulty.
Hand Release Push-Up (HRPU). At the bottom of the movement, you fully lay the chest on the floor and lift the hands for a second before pushing up. This variation removes the bounce and forces a cold start on every rep. It is the standard test in the US Army.
Weighted military push-ups. With a weighted vest, 5-10 kg is enough to transform the exercise. Save this variation for after 3×15 strict bodyweight reps.
Placement in the calisthenics progression: standard push-ups (wide) → military push-ups (tucked) → diamond push-ups (hands together) → archer push-ups → one-arm push-ups. Each step narrows the hand placement and loads the triceps more.
What comes after military push-ups?
When you hold 3×15 military push-ups in strict form, two directions open up.
Diamond push-ups narrow the hands further (thumbs and index fingers touching). This is the logical next step to keep loading the triceps. If military push-ups hit 60% triceps / 40% chest, diamond push-ups push to 80% triceps.
The different push-up variations let you vary the stimulus: decline for upper chest, pike for shoulders, archer for unilateral strength. The military push-up is the technical base that makes all these variations cleaner.
If you are following a beginner program, the military push-up is a great upgrade over the standard push-up from phase 2 onward. The strict form it enforces speeds up progression toward dips and advanced variations.