Skills
How to do the V-Sit
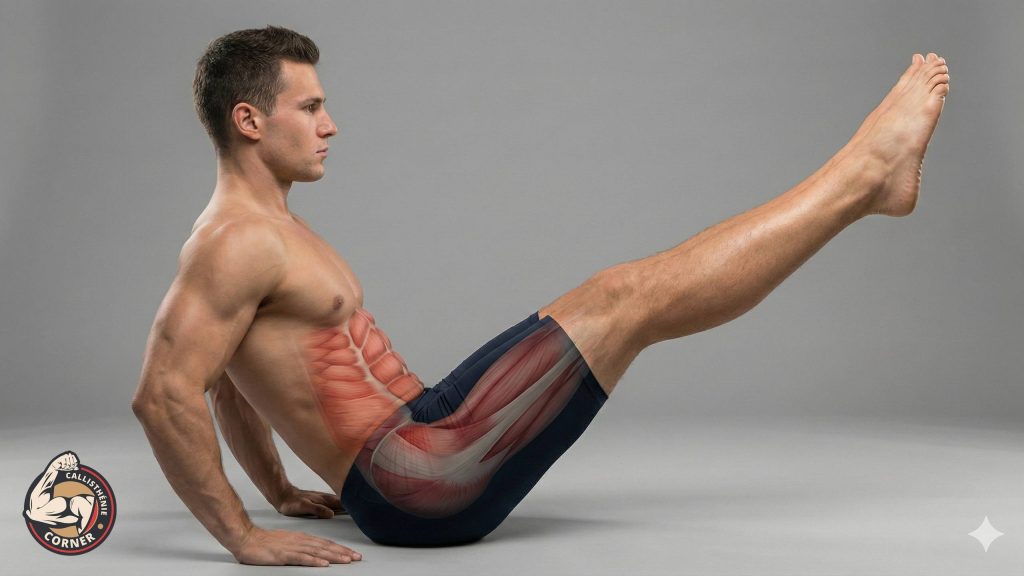
The V-sit means forming a "V" with your body: you lift your legs and torso at the same time and hold. It hammers the abs and hip flexors, and a clean hold demands serious compression strength on top of hamstring flexibility.
Whether you are a beginner in calisthenics or already advanced, here is how to build the V-sit from the ground up.
The V-sit is often used in calisthenics programs because it intensely engages the abdominal muscles along with the stabilisers of the hips and the lower back.
Benefits of the V-Sit
The V-sit offers several advantages, not only for the abdominals but for the entire body:
- Core strengthening: The central muscles, including the abdominals and lower back muscles, are engaged to maintain the position.
- Improved balance and stability: This exercise strengthens the stabiliser muscles, which improves overall posture and balance.
- Hip flexibility: By lifting the legs, you also engage the hamstrings and hip muscles.
- Gateway to advanced holds: The deep compression strength you build is exactly what harder seated skills demand next.
Prerequisites for the V-Sit
Before attempting the V-sit, make sure you have mastered these basics:
- L-Sit: Hold for 15 seconds with straight legs
- Core endurance: Plank for 45 seconds minimum
- Flexibility: Be able to touch your toes while seated with straight legs
- Compression: Hanging leg raises, 10 clean reps
Physical preparation for the V-Sit
Before starting, it is important to prepare your body to avoid injuries:
Warm-up
A proper warm-up is essential. Focus on dynamic exercises like jumping jacks, hip rotations and planks to activate the trunk muscles.
Stretching
Stretch your hamstrings and hip flexors to improve your flexibility. Use movements like butterfly stretches and toe touches.
Preliminary exercises
- L-Sit: This exercise helps strengthen the trunk while getting used to lifting the legs.
- Crunches: They target the lower abdominals, preparing the muscles for lifting the legs.
- Planks: Strengthen the trunk and improve stability.
V-Sit technique step by step
| Step | Description |
|---|---|
| 1. Starting position | Sit on the floor with your legs straight and your hands placed at your sides. |
| 2. Transition to the V | Contract your abdominals and simultaneously lift your legs and torso. |
| 3. Hold the position | Maintain the V shape with your arms extended forward, engaging your trunk throughout. |
| 4. Return to the floor | Lower yourself slowly while controlling the movement to maximise abdominal engagement. |
Common mistakes to avoid
Rounding the back
This reduces abdominal engagement and puts more pressure on the lower back.
Fix: Make sure to keep your spine straight throughout the exercise. Think about pushing your chest forward.
Swinging the arms
Arm swinging makes the exercise less effective and introduces momentum rather than controlled strength.
Fix: Keep your arms fixed and parallel to the floor throughout the movement.
Lifting legs without engaging the core
For the V-sit to be effective, your abdominals must do the work, not your hips.
Fix: Focus on engaging the trunk with every repetition. If you feel the effort mostly in your hip flexors, reset and brace your abs first.
V-Sit training program (8 weeks)
By progressively increasing the duration and intensity, you will strengthen your muscles and improve your technique.
| Week | Exercise | Duration / Reps | Sets |
|---|---|---|---|
| 1-2 | L-Sit with bent knees | 10 seconds | 3 |
| 3-4 | L-Sit with straight legs | 15 seconds | 3 |
| 5-6 | Modified V-Sit (bent knees) | 10 seconds | 3 |
| 7-8 | Full V-Sit | 5-10 seconds | 3 |
Variations and modifications
If the standard V-sit is too difficult or if you want new challenges:
- Modified V-Sit: Bend your knees or lean on your elbows to reduce the difficulty. This is the ideal starting point for most people.
- V-Sit on an unstable surface: Use a balance disc or a BOSU to make the exercise harder and improve stabilisation.
- V-Sit on parallel bars: This advanced variation also engages the arms and adds an additional challenge for the trunk. Parallettes work great for this.
What comes after the V-Sit?
Once you have mastered the V-sit (10 clean seconds), progress towards:
For the full picture, the calisthenics skills library ranks every hold and skill by level so you can see what sits before and after the V-sit.
