The dead hang is one of the most underrated exercises in calisthenics. You grab a bar, hang with straight arms, and let gravity do the rest. It looks like nothing is happening, but your body is getting stronger, decompressing, and building the foundation for every pulling movement you’ll ever learn.
Why dead hang? 4 benefits you can’t ignore
Most people skip the dead hang because it seems too simple. That’s a mistake. Here’s what happens when you hang regularly.
Spinal decompression
Hours of sitting compress your intervertebral discs. Hanging reverses this by allowing gravity to gently traction your spine. The result: less stiffness, reduced lower back tension, and a noticeable sense of relief after every session. If you sit at a desk all day, this alone is reason enough to hang.
Grip strength
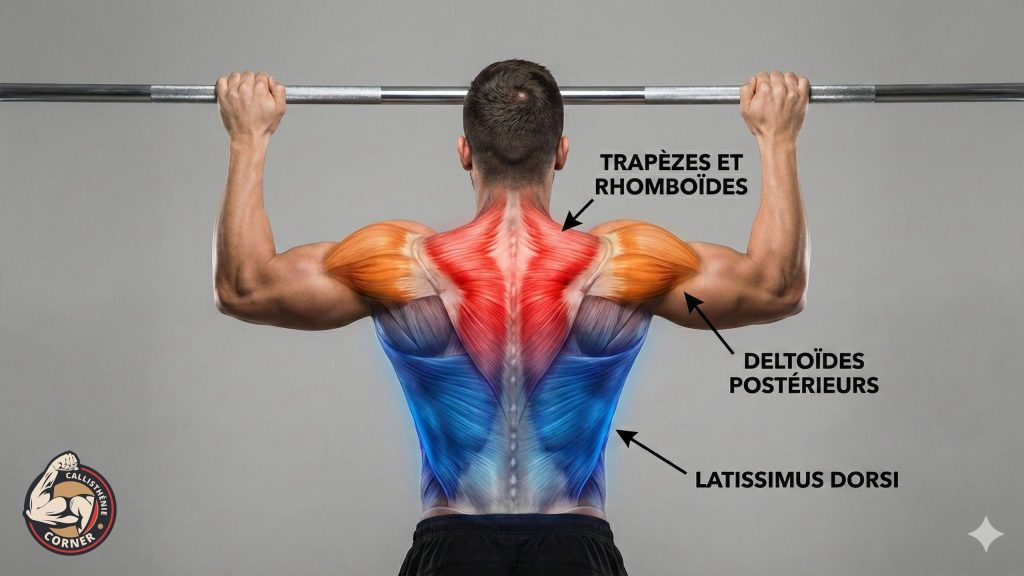
Your forearms support your entire bodyweight in an isometric hold. This builds crushing grip strength that transfers directly to pull-ups, deadlifts, and every bar exercise in calisthenics. Grip is often the limiting factor in pulling movements, and dead hangs fix that problem at the source. For a structured approach to building your grip, check our complete grip training guide.
Shoulder health and mobility
The overhead hanging position stretches the rotator cuff, improves range of motion, and stabilizes the scapulae. For anyone with tight shoulders from bench pressing or desk posture, regular dead hangs can significantly improve overhead mobility. Many physical therapists recommend them as part of shoulder rehabilitation protocols.
Foundation for advanced skills
The dead hang is step zero for serious calisthenics. You cannot build toward muscle-ups, front levers, or strict pull-ups without first being comfortable hanging from a bar. Every advanced pulling skill starts here.
Prerequisites
The dead hang is accessible to virtually everyone, including complete beginners. No special strength is required to get started.
The only condition: healthy shoulders. If you have a recent rotator cuff injury or active tendinitis, consult a professional before hanging. Pain during the hang means stop immediately.
Self-test: hang from a bar for 10 seconds without pain. If you can do that, you’re ready. If you fall before 10 seconds or feel discomfort, start with an assisted version: keep one foot on the ground or on a box to reduce the load. Resistance bands looped around the bar can also reduce your bodyweight during the hang.
If you’re brand new to training, check our start calisthenics guide for a structured introduction.
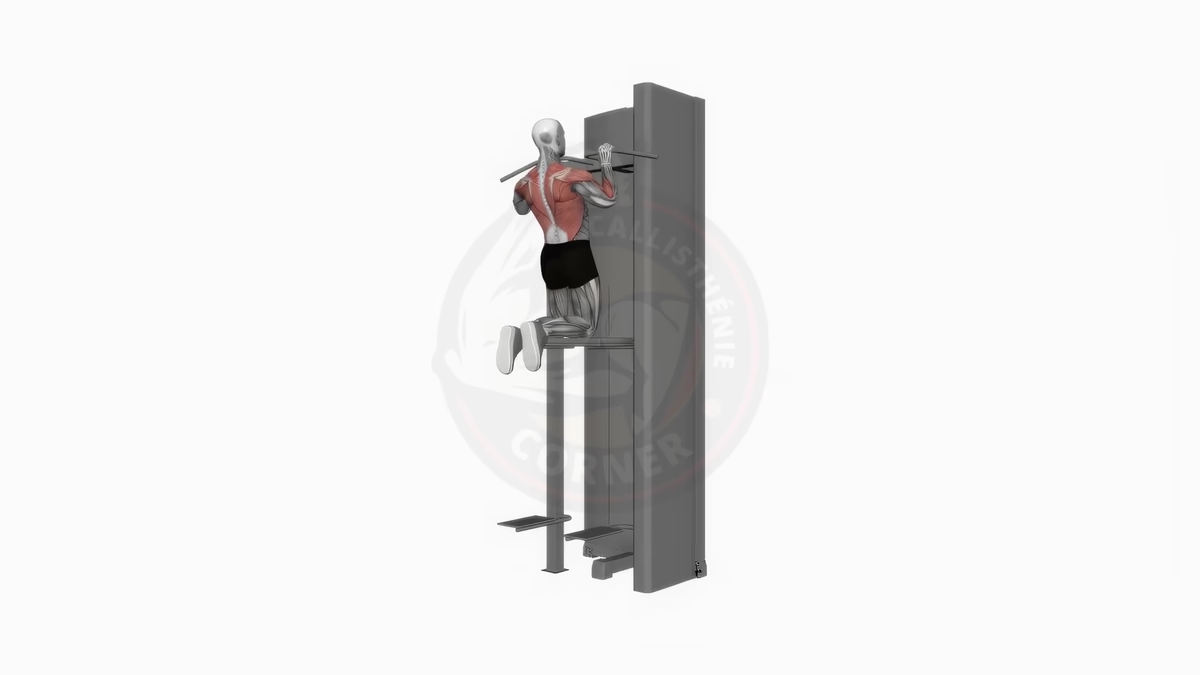
Technique step by step
Proper form makes the difference between a therapeutic exercise and a shoulder impingement waiting to happen.
- Grip the bar overhand (palms facing away), hands slightly wider than shoulder-width. Wrap your thumbs around the bar for a secure grip.
- Lift your feet off the ground. Let your body hang freely.
- Arms completely straight. Lock your elbows. Zero bend. This is a passive hang, not a flex-arm hold.
- Shoulders low and relaxed. Let them rise toward your ears naturally, then consciously pull them slightly down and away from your ears. You want length, not tension.
- Body aligned from head to feet. No swinging, no twisting. Engage your core lightly to prevent excessive arching.
- Breathe regularly. Slow, controlled breaths. Holding your breath creates unnecessary tension and shortens your hang time.
Target durations
| Level | Hold time |
|---|---|
| Beginner | 10-20 seconds |
| Intermediate | 30-45 seconds |
| Advanced | 60-90+ seconds |
Quality over quantity. A 15-second hang with perfect form and controlled breathing beats a 30-second hang where you’re swinging and white-knuckling the bar.
Variants and progressions
Once you can hold a solid passive dead hang for 30+ seconds, it’s time to explore variations.
Passive vs. active dead hang
The passive dead hang is what we’ve described above: arms straight, shoulders relaxed, full decompression. The active dead hang adds a subtle scapular engagement: pull your shoulder blades down and back without bending your elbows. This activates the lats and prepares you for scapular pull-ups.
Grip variations
- Overhand (pronation): standard grip, targets forearms broadly
- Underhand (supination): chin-up grip, emphasizes biceps and inner forearms
- Neutral grip: palms facing each other (if your bar allows it), easiest on the shoulders
Rotate between grips across sessions for balanced forearm development.
Time progression
Start at your current max hold. Add 5 seconds every 2-3 weeks. This gradual approach prevents overuse injuries in the fingers and wrists.
Example progression: 10s → 15s → 20s → 25s → 30s → 40s → 50s → 60s → 75s → 90s.
Weighted dead hang
Once you comfortably hold 60 seconds, add external load. Start with +5 kg using a dip belt or a backpack. The added weight accelerates grip strength gains and prepares your connective tissue for weighted pull-ups.
One-arm dead hang
The ultimate grip challenge. Start by removing one finger at a time from your support hand before going full single-arm. This is an advanced skill that requires months of progressive training.
Finger hangs
Very advanced. Hang from 4 fingers, then 3, then 2. Primarily for climbers and those training extreme grip endurance. Approach with caution since tendons adapt much slower than muscles.
Frequently Asked Questions
How long should you dead hang?
Beginners should aim for 10 to 20 seconds with proper form, then add 5 seconds every 2 to 3 weeks. Intermediate athletes can target 30 to 45 seconds, and advanced practitioners should work toward 60 to 90 seconds. A quality 20-second hang with relaxed shoulders and controlled breathing beats a 40-second hang with shaking and white-knuckling.
Is dead hanging good for you?
Yes. Dead hangs deliver multiple benefits with minimal injury risk. They decompress the spine after sitting, build grip strength that transfers to every pulling exercise, improve shoulder mobility, and prepare the body for advanced calisthenics skills. Physical therapists frequently recommend them for shoulder rehabilitation and posture correction.
Does dead hanging decompress the spine?
It does. When you hang freely, gravity gently tractions the spine, creating space between the vertebrae and relieving pressure on the intervertebral discs. This can reduce stiffness, ease lower back tension, and provide noticeable relief, especially for people who spend long hours sitting. For best results, hang for 20 to 30 seconds daily with a relaxed body.
What comes after the dead hang
The dead hang is a starting point, not a destination. Here’s your roadmap.
Once you can hold a comfortable 30-45 second dead hang, move to scapular pull-ups. This exercise teaches you to engage your back muscles from a dead hang, and it’s the bridge between hanging and pulling.
From scapular pull-ups, you progress to full pull-ups, then toward advanced skills like the front lever and muscle-up.
Integrating dead hangs into your routine
As a warm-up: 2-3 sets of 20-30 seconds before your pulling workout. This decompresses the spine, activates the grip, and prepares the shoulders.
As a finisher: 1 set, max hold, at the end of your back session. Your grip is already fatigued, so this pushes your forearm endurance to its limit.
As a daily habit: One 30-60 second hang every morning. Low fatigue, high reward. Your spine and shoulders will thank you within weeks.
The dead hang costs nothing, requires nothing more than a bar, and delivers benefits that compound over time. Stop overcomplicating your training. Grab a bar, hang, breathe, and let gravity do what it does best.