Why train decline push-ups?
To target the upper chest. The angle created by elevating your feet shifts the load distribution and places greater emphasis on the clavicular (upper) portion of the pectorals. If you want complete chest development, decline push-ups are the perfect complement to classic push-ups.
To increase intensity without equipment. The higher your feet, the greater the percentage of your bodyweight that rests on your arms. It is natural progressive overload with nothing more than a bench or a chair.
To strengthen the shoulders. The incline increases the demand on the anterior deltoids. Decline push-ups serve as a transition toward more vertical exercises like pike push-ups, which target the shoulders even further.
To prepare for advanced variations. Mastering decline push-ups builds the strength foundation needed to tackle more technical pressing movements down the line.
Strength prerequisites
20 classic push-ups minimum. If you cannot perform 20 clean reps, you are not ready for the decline version. Build your base first with standard push-up variations.
Solid core: 45-second plank. Decline push-ups demand more trunk stability than standard push-ups. If your hips shake or sag after 30 seconds of plank, work on your core before adding the incline.
Healthy shoulders. The decline angle increases pressure on the shoulder joints. If you have pain or a history of shoulder injuries, progress carefully and start with a low elevation (10-15 cm).
Quick test
- 20 classic push-ups with perfect technique
- 45-second plank without moving
- No shoulder pain during pressing movements
You pass all three? Start training decline push-ups.
How to do decline push-ups: step-by-step technique
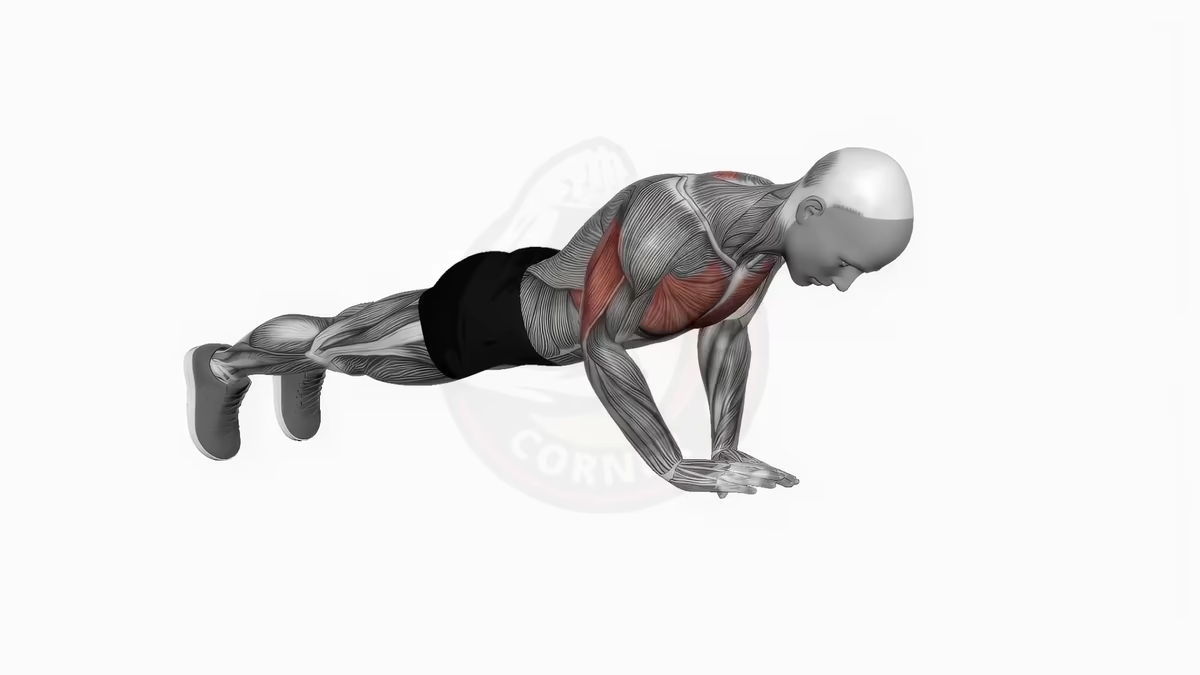
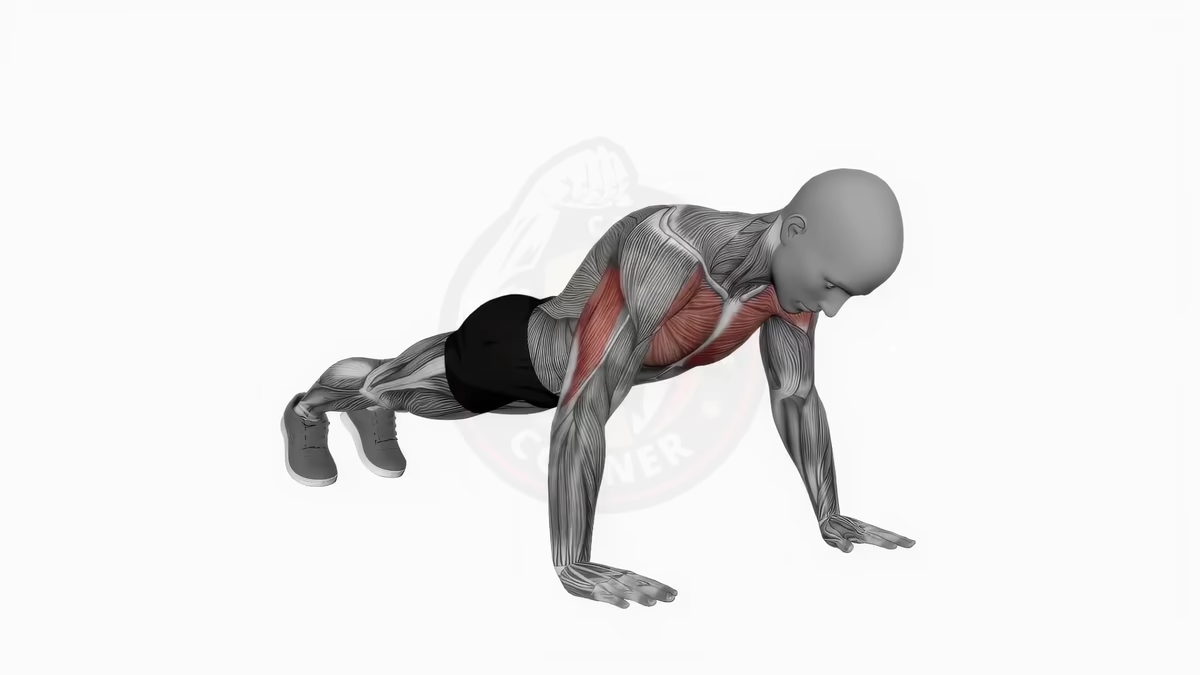
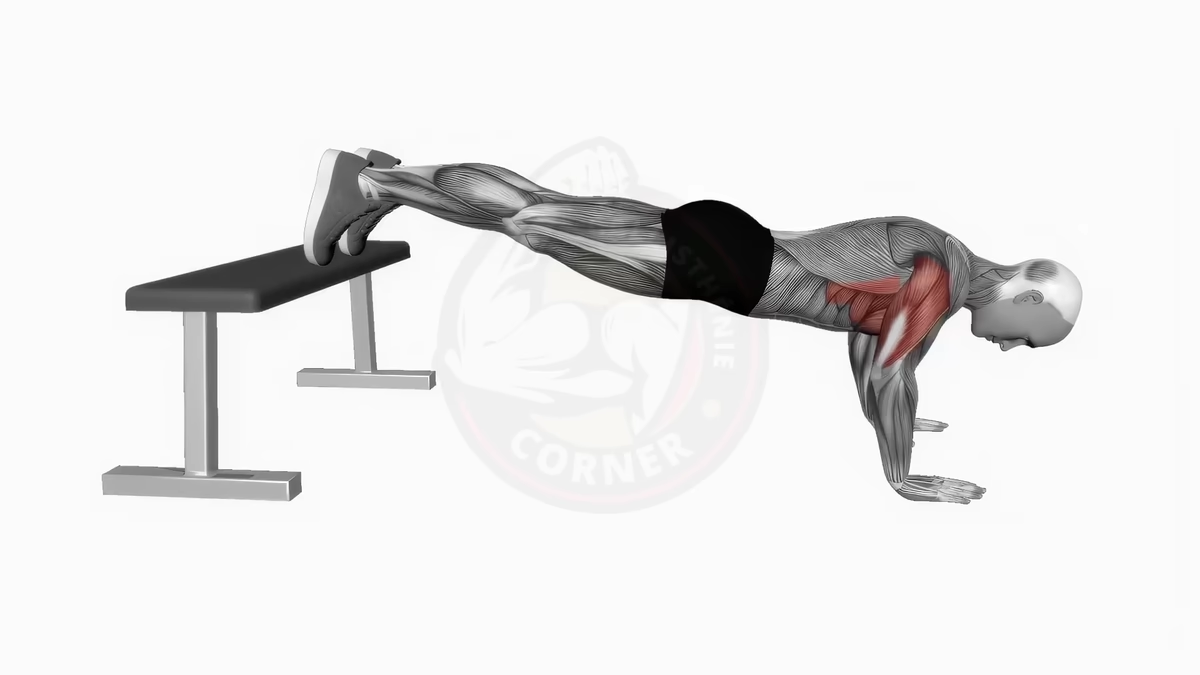
Starting position: Hands on the floor, shoulder-width apart, fingers pointing forward. Feet elevated on a bench, chair, or step (30-50 cm height to start). Arms straight. Your body forms an inclined straight line from head to heels.
Descent: Bend your elbows at roughly 45 degrees from your body. Lower yourself until your chest is about 5 cm from the floor or lightly touches. Control the descent over 2 seconds. You should feel tension in the upper chest and front shoulders.
Important point: Your body stays rigid despite the incline. Glutes contracted, abs braced. The elevation of your feet pushes your hips to rise: resist this tendency and maintain a straight line.
Ascent: Push hard through your hands to return to the top. Exhale during the push. Rise in about 1 second to full arm extension.
Breathing: Inhale on the way down, exhale as you push up. Coordinating your breathing helps maintain abdominal tension.
Height progression: Start at 30 cm of elevation. When you can perform 3 sets of 12 reps with clean form, increase gradually to 40 cm, then 50-60 cm for maximum intensity.
Common mistakes
Butt rising. The incline naturally pushes your pelvis upward, creating an angle at the hips instead of a straight body line. Fix: Contract your glutes and push your hips slightly forward to maintain alignment. If you cannot keep it straight, lower the elevation.
Elbows flaring wide. This is even more problematic in the decline position than in classic push-ups. The angle increases pressure on the shoulder joint. Keep your elbows at 45 degrees maximum from your body.
Unstable surface. If your support moves or slides during the effort, you lose efficiency and risk injury. Use a stable, non-slip surface. A solid bench is far better than an office chair with wheels.
Too much height too fast. Jumping from a 30 cm elevation straight to 80 cm puts sudden overload on your shoulders. Progress in increments of 10-15 cm every 2-3 weeks.
6-week training program
Weeks 1-2: Adapting to the angle
- 3 sessions per week
- Feet at 30 cm height
- 3-4 sets x 8-10 reps
- 2-3 minutes rest between sets
- Goal: 3 sets of 12 clean reps
Weeks 3-4: Building volume
- 3 sessions per week
- Feet at 40 cm height
- 4 sets x 10-12 reps
- 2 minutes rest between sets
- Goal: 4 sets of 12 controlled reps
Weeks 5-6: Intensification
- 3 sessions per week
- Feet at 50 cm height
- 4-5 sets x 8-12 reps
- 2 minutes rest between sets
- Goal: Master the maximum elevation with full range of motion
If you struggle: Reduce the elevation height rather than sacrificing depth or technique. 12 clean reps at 30 cm are worth more than 5 sloppy reps at 50 cm.
Variations and progressions
Slow tempo decline push-ups. 4-5 seconds down, 2 seconds up. Maximizes time under tension for hypertrophy. Ideal if you have stalled on volume but want to keep progressing.
Pause decline push-ups. 2-second hold at the bottom position. Eliminates the stretch reflex and builds the ability to produce force from a dead-stop position.
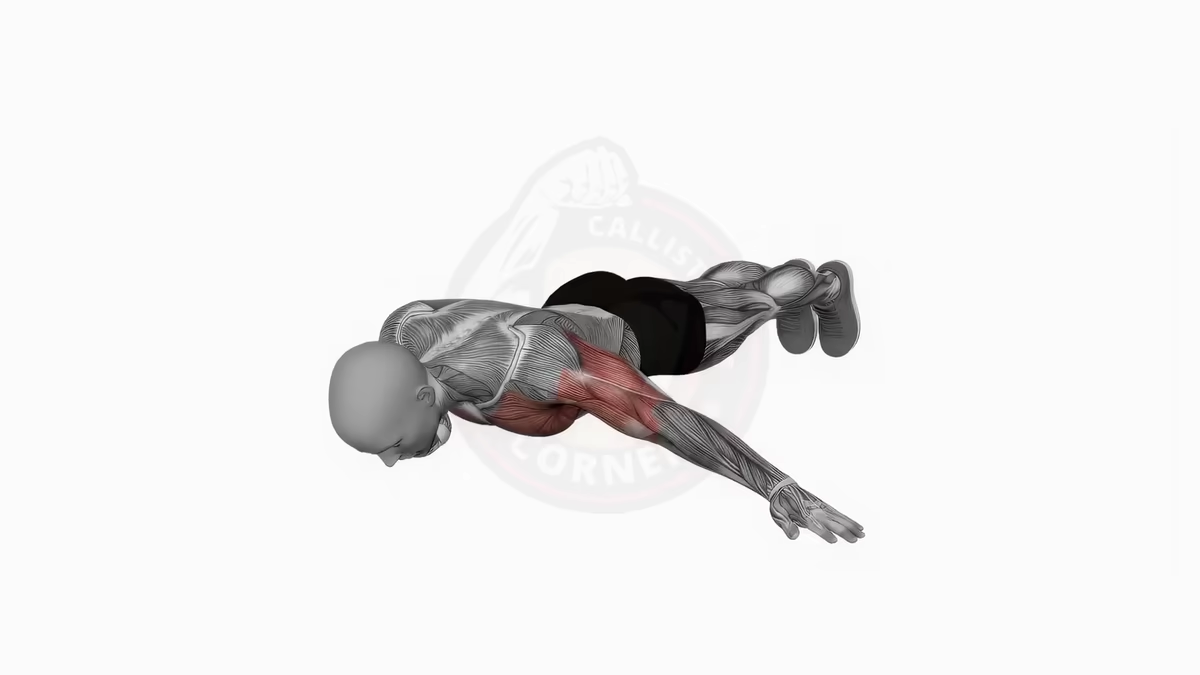
Decline diamond push-ups. Combines the decline angle with the diamond push-up hand placement. Maximum engagement of the triceps and upper chest. Reserved for advanced athletes who already master diamond push-ups on flat ground.
Decline archer push-ups. Feet elevated plus lateral weight shift. Extreme preparation for one-arm push-ups, combining the benefits of archer push-ups with the added intensity of the decline angle.
What comes after decline push-ups?
Integration into a complete program. Decline push-ups do not replace classic push-ups: they complement them. Alternate both in your weekly routine (classics on Monday, decline on Thursday, for example) to develop your entire chest evenly.
Progression toward pike push-ups. If the shoulder emphasis appeals to you, pike push-ups are your next step. They increase the angle further and prepare you for handstand push-ups.
Balanced upper-body development. Decline push-ups are one tool in a complete arsenal. Combine them with dips, pull-ups, and other push-up variations for well-rounded development.
Your calisthenics progression depends on smart diversification. Decline push-ups are a powerful addition to your training toolkit.