The archer push-up is the push-up variation that bridges the gap between bilateral pressing and true unilateral strength. You lower yourself by shifting your weight onto one arm while the other stays extended to the side. The movement looks like an archer drawing a bow, hence the name.
The working arm supports 70-80% of your bodyweight and performs a full bend. The extended arm slides laterally and acts as a stabilizer. This asymmetric loading forces each side to develop independent strength, making it the most direct stepping stone toward the one-arm push-up.
Muscles targeted: Chest and triceps of the working arm as the primary movers, shoulders for stabilization, core to prevent hip rotation.
Why train archer push-ups?
Unlock one-arm push-ups. Standard push-ups are not enough to build the unilateral strength you need. Archer push-ups let you train with 70-80% of your weight on one arm before committing to 100%.
Fix imbalances. Each arm learns to handle a significant load independently. Your weaker side catches up over time.
Maximize muscle growth. By increasing the intensity on one arm, you create a stronger growth stimulus than bilateral push-ups can provide. Archer push-ups are one of the most effective bodyweight chest exercises for progressing without any equipment.
Strength prerequisites
20 classic push-ups minimum. If you cannot hit this number with clean form, your body is not ready for asymmetric loading. Build your base first with standard push-up variations.
10 clean diamond push-ups. They strengthen your triceps, which are essential for stabilizing the working arm during archer push-ups. If diamond push-ups are still challenging, prioritize those first.
30 seconds in a high plank position. Arms straight, body rigid, no shaking. If your hips sag before the 30-second mark, your core is not strong enough yet.
Quick test
- 20 classic push-ups with perfect technique
- 30 seconds in high plank without moving
- 10 clean diamond push-ups
You pass all three? Start training archer push-ups. If not, spend 2-3 weeks reinforcing these foundations.
How to do archer push-ups: step-by-step technique
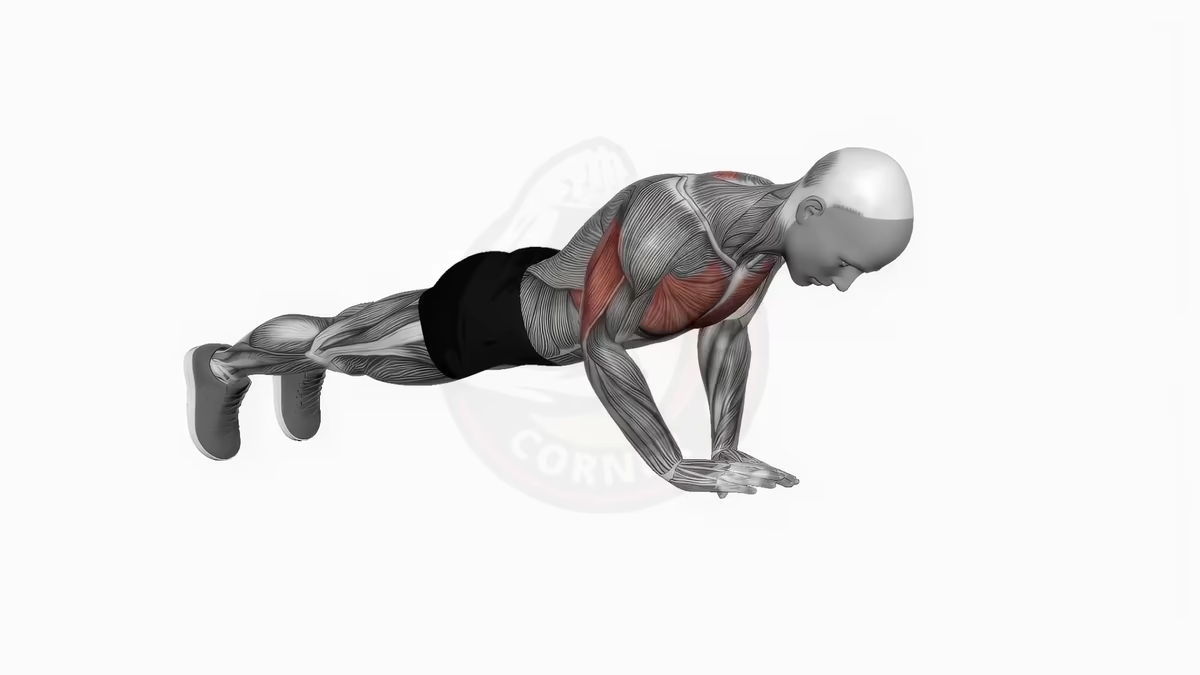
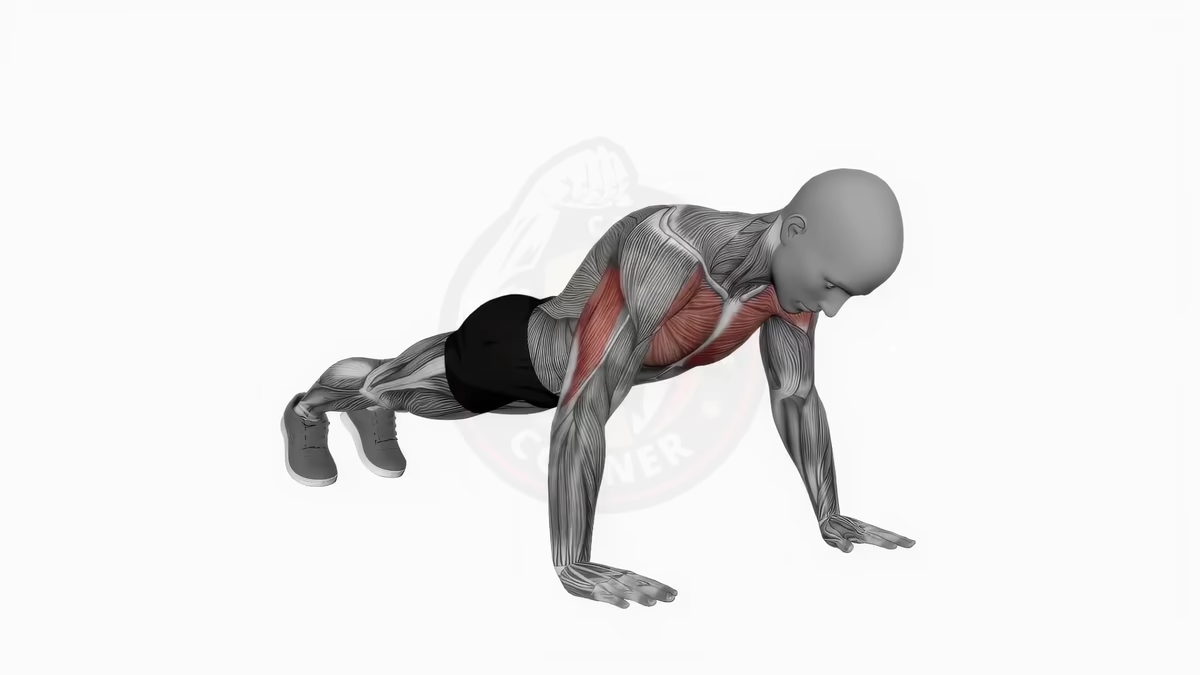
Starting position: Hands placed 1.5 times wider than shoulder-width, fingers pointing forward. Body in a straight line from head to heels.
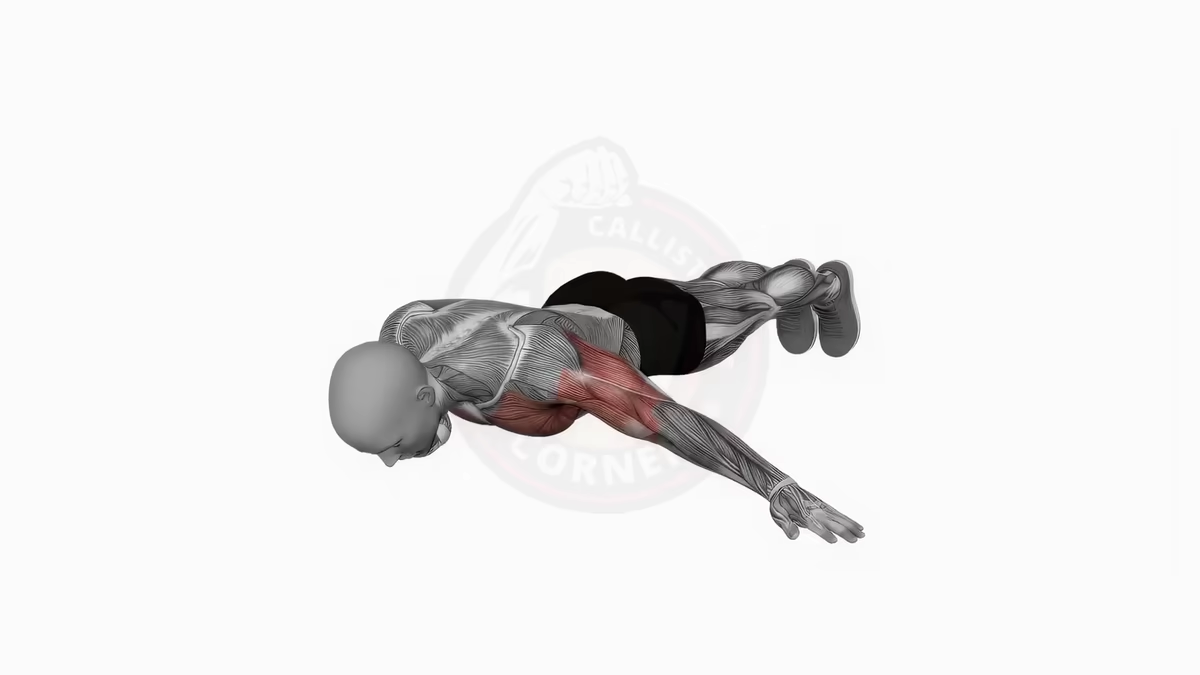
Descent: Shift your weight toward one arm (let’s say the right). The right elbow bends fully while the left arm stays straight and slides laterally. Lower yourself until your chest is 5-10 cm from the floor. Your extended arm points out to the side, forming the archer position.
Critical point: Hips stay stable. Zero rotation of the pelvis. Contract your abs and glutes throughout.
Ascent: Push hard with the working arm. The extended arm returns toward center. Rise back to the starting position.
Breathing: Inhale on the way down (2 seconds), exhale as you push up (1 second).
Alternation: You can alternate one rep right, one rep left. Or complete all reps on one side, then switch. Both approaches work.
Common mistakes
Bent support arm: The extended arm must stay at 170-180 degrees. If you bend it, you turn the movement into a wide-grip push-up and lose the unilateral benefit entirely.
Hip rotation: A sign of weak core bracing. Your hips must face the floor at all times. Squeeze your abs and glutes as if you were resisting a lateral push.
Partial descent: Go down to at least 5-10 cm from the floor. Half range of motion equals half results.
Side imbalance: Perform the exact same number of reps on each side. Not 10 on the right and 5 on the left because you are fatigued. Equal volume, always.
Training program
Weeks 1-2
- 3 sessions per week
- 3-4 sets x 3-5 reps per arm
- 2-3 minutes rest between sets
- Goal: 5 clean reps on each side
Weeks 3-4
- 3 sessions per week
- 4-5 sets x 5-8 reps per arm
- 2 minutes rest between sets
- Goal: 8 controlled reps on each side
If you struggle, scale down:
- Kneeling archer push-ups
- Incline archer push-ups (hands on an elevated surface)
- Slow negatives (lower in 5 seconds, push back up with both arms)
You can do 3 sets of 8 clean reps on each side? Move to the next progression.
Variations and progressions
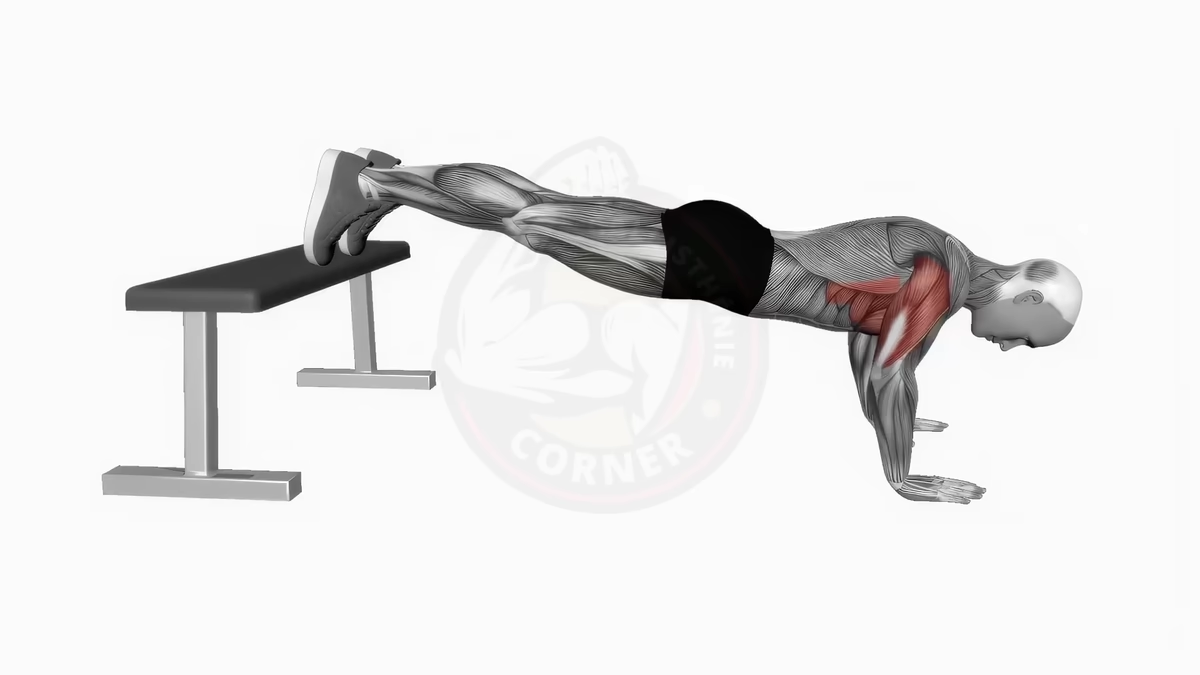
Feet-elevated archer push-ups: More weight on the upper body, increased shoulder engagement. Combine with pike push-ups for complete deltoid development.
Slow tempo archer push-ups: 4-5 seconds down, 1 second hold at the bottom, 2 seconds up. Maximizes time under tension for greater strength gains.
Pause archer push-ups: 2-second hold at the bottom position. Eliminates the stretch reflex and forces pure force production from a dead stop.
What comes after archer push-ups?
One-arm push-ups: The logical next step. Once you master 3 sets of 10 archer push-ups on each side, gradually reduce the support from the extended arm until you can eliminate it completely.
Keep diversifying: Archer push-ups are now part of your training arsenal. Combine them with dips, pull-ups, and other variations for balanced upper-body development.
Your calisthenics progression relies on the gradual mastery of increasingly demanding movements. Archer push-ups are an essential milestone on the road to advanced bodyweight skills.