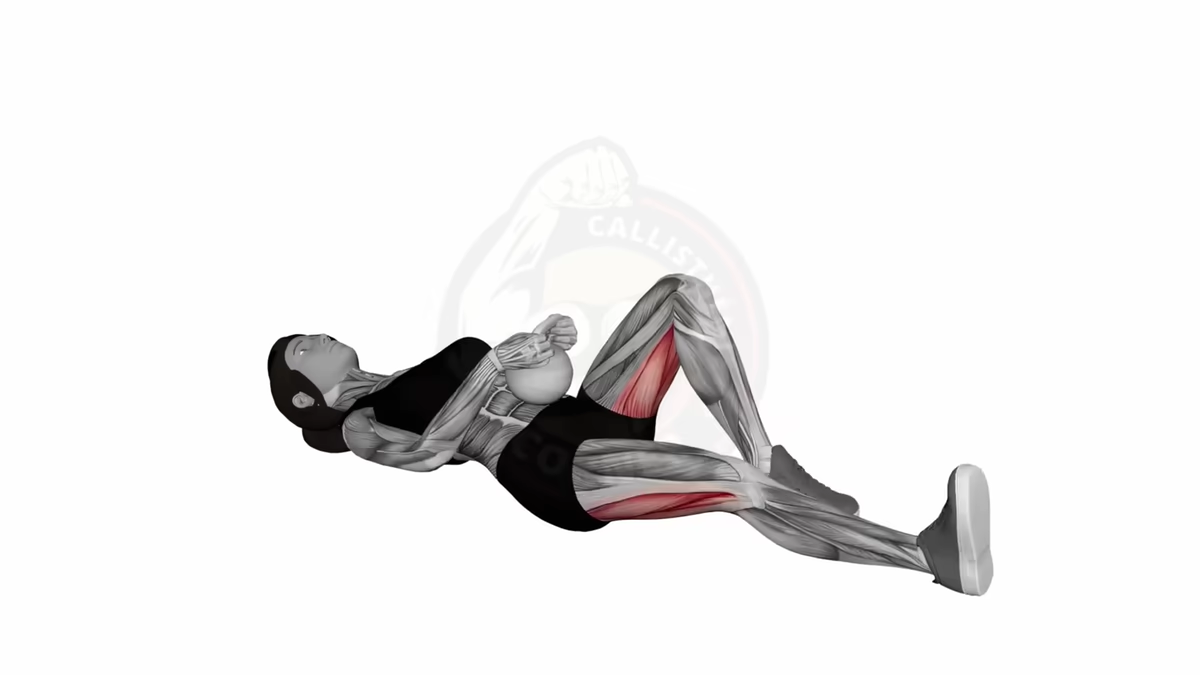
The single-leg glute bridge (single-leg hip bridge) is the unilateral version of the classic glute bridge. By working one leg at a time, you double the intensity on each glute and force your body to stabilize the movement without compensation.
The main advantage? It reveals and corrects strength imbalances between your left and right legs. If your right glute is weaker, there’s no way to cheat: it has to work just as hard as the left.
This exercise primarily targets the gluteus maximus, the most powerful muscle in your body. The hamstrings assist, while your abs and gluteus medius work hard to keep your hips aligned and prevent pelvic rotation.
In calisthenics, this is a progression exercise. You slot it in right after mastering the classic glute bridge and before moving to the hip thrust. It prepares your glutes for heavier loads and more complex movements.
Strength prerequisites
Before tackling the single-leg glute bridge, you need to master the bilateral version first. No skipping steps.
Prerequisite 1: be able to perform 3 sets of 15 reps of the classic glute bridge with flawless technique. If you’re shaking or your hips sag before rep 15, you’re not ready.
Prerequisite 2 (core test): hold the top position of the glute bridge for 30 seconds without trembling and without arching your lower back. Your hips must stay aligned with your shoulders and knees.
Prerequisite 3 (stability test): stand on one leg for at least 20 seconds without your pelvis shifting to one side. The single-leg glute bridge demands this same unilateral stability.
If you pass all three tests, you’re ready to progress to the single-leg version.
How to do the single-leg glute bridge: step-by-step technique
Step 1: Starting position
Lie on your back, arms at your sides, palms flat on the floor for extra stability. Bend one knee with the foot flat on the ground about 30 cm from your glutes. Extend the other leg toward the ceiling, or bend it with the knee pulled toward your chest (easier version).
Engage your abs and your core before you even start moving. This is the key to keeping your hips aligned.
Step 2: Ascent
Push hard through your heel (not the ball of your foot) to lift your hips toward the ceiling. Rise until your body forms a straight line from shoulders to knee, passing through the hip.
At the top of the movement, voluntarily squeeze your gluteus maximus for 1 to 2 seconds. Your hips must stay perfectly horizontal, with no rotation or tilting. If your pelvis twists, you’re either going too high or your core is too weak.
Exhale during the ascent. Breathing helps maintain tension in your core.
Step 3: Descent
Lower yourself in a controlled manner over 2 to 3 seconds. Don’t let yourself drop. Your glutes should nearly touch the floor without fully resting between reps. This keeps muscular tension constant.
Inhale during the descent. Keep your core engaged through the last rep.
Critical technique points: your support foot stays firmly planted on the ground, knee aligned with the ankle. The raised leg doesn’t move. Your hips go up and down like an elevator, with zero lateral sway.
Common mistakes to avoid
Hips rotating or tilting. This is the number one error. When you rise, your pelvis tilts sideways or rotates. This means your gluteus medius and abs aren’t stabilizing enough. Solution: voluntarily contract your obliques and gluteus medius before rising. Reduce the range of motion if necessary and focus on stability before height.
Excessive lower back arching. If you arch your back to get higher, you’re cheating. The extension must come from the hip, not from the lumbar spine. Solution: only rise to the shoulder-hip-knee alignment. Not higher. Engage your core to lock your spine in a neutral position.
Hamstring cramps. If the back of your thigh cramps up, your hamstrings are compensating for weak glutes. Solution: actively push through your heel (not the front of your foot) and consciously contract your gluteus maximus at the top of each rep. If it persists, go back to the classic glute bridge to strengthen your glutes first.
Insufficient range of motion. You barely rise, with your hips lifting only a few centimeters. Result: your glutes work at only 30% of their potential. Solution: rise all the way to full alignment. Film yourself from the side to verify you’re reaching the proper position.
6-week training program
Here’s a 6-week program to progress from the classic glute bridge to a fully mastered single-leg glute bridge. Integrate it 2 to 3 times per week in your leg or glute sessions.
Weeks 1-2: Unilateral adaptation
- 2 to 3 sessions per week
- 3 sets x 8-10 reps per leg
- 90 seconds rest between sets
- Goal: master pelvic stability with zero rotation
Weeks 3-4: Volume increase
- 3 sessions per week
- 4 sets x 12-15 reps per leg
- 60 seconds rest between sets
- Goal: 4 sets of 15 clean reps with total control
Weeks 5-6: Intensification
- 3 sessions per week
- 4 sets x 10-12 reps per leg with a 2-second pause at the top
- 90 seconds rest between sets
- Goal: maximum voluntary contraction, tempo 2-2-2 (ascent-pause-descent)
Easier option: if you struggle during weeks 1-2, start with the raised leg bent (knee toward chest) rather than extended. This reduces instability and lets you focus on hip extension.
Variations and progressions
Once you’ve mastered the classic single-leg glute bridge, here’s how to keep progressing.
Elevated foot variant
Place your support foot on a raised surface of 10 to 15 cm (step, yoga block). This increases the range of motion and intensifies the work on the gluteus maximus and hamstrings.
Slow tempo variant: 3-1-3
3 seconds up, 1 second contracted pause at the top, 3 seconds down. The time under tension skyrockets, and your glutes get zero rest. This is devastating for hypertrophy.
Isometric hold variant
Rise to the top position and hold the contraction for 5 to 10 seconds. Lower and repeat. Perfect for developing isometric strength and muscular endurance.
Weighted variant
Place a plate, kettlebell, or sandbag on your hip on the working side. Start light (5 kg) and increase progressively. Reserved for those who can easily complete 4 sets of 15 bodyweight reps.
What comes after the single-leg glute bridge?
Once you can complete 4 sets of 15 reps per leg with controlled tempo, you’re ready for what’s next.
Single-leg hip thrust: the natural progression. The hip thrust allows greater range of motion and heavier loading thanks to the elevated back position. The single-leg version is the ultimate bodyweight glute exercise.
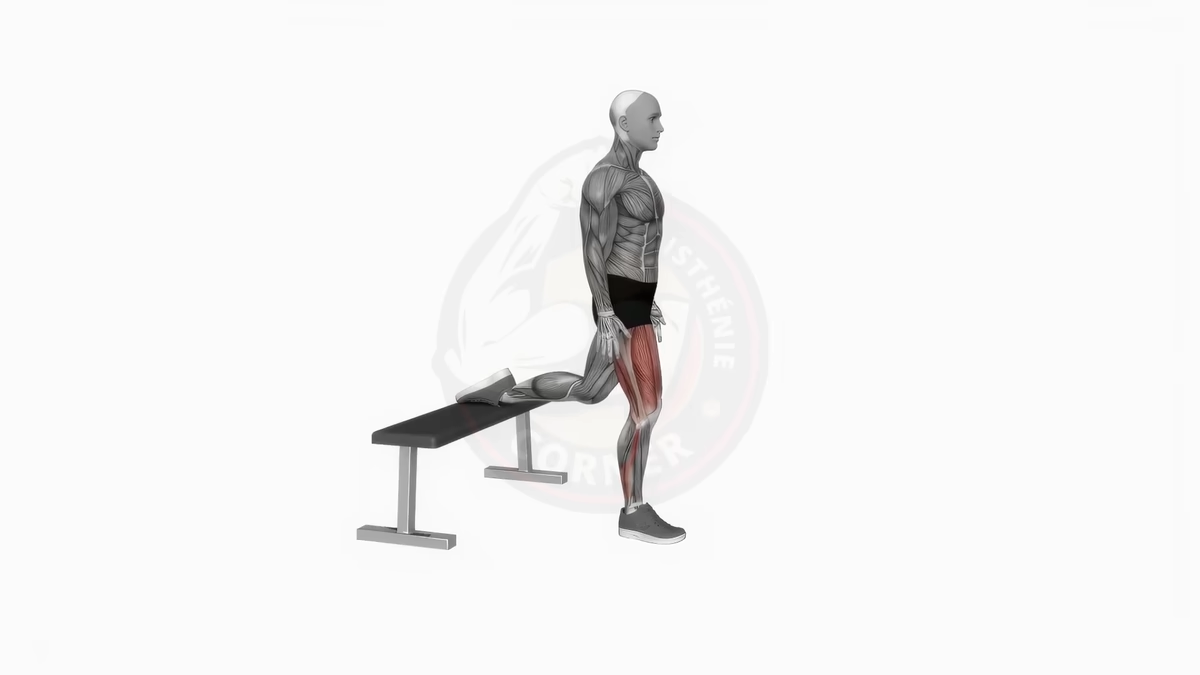
Complementary exercises: integrate donkey kicks for isolated hip extension, bulgarian split squats for unilateral strength, or nordic curls for hamstring reinforcement.
Build a complete lower-body routine by combining the single-leg glute bridge with a plank for core stability and the exercises listed above. If you’re just starting your calisthenics journey, the single-leg glute bridge is one of the best progressions you can master early on.