Skills
How to master the Handstand Push-Up
The handstand push-up is a major challenge for calisthenics and CrossFit athletes. This complex exercise intensely engages the shoulders, triceps and core, while demanding perfect balance. This detailed guide will walk you through every step towards mastering this movement.
The fundamentals of the handstand push-up
The handstand push-up, often abbreviated HSPU, is an advanced exercise that combines strength, balance and coordination. It involves performing a push-up while in a handstand position, making it a particularly demanding movement for the upper body.
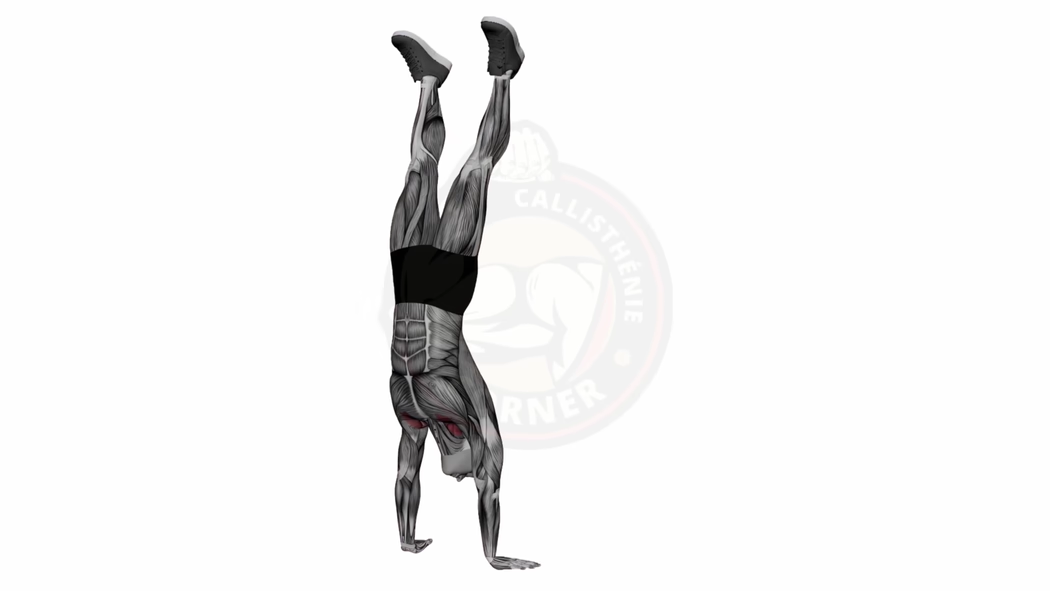
The primary muscles engaged during a HSPU are:
- Deltoids (shoulders): the main movers in the pressing motion
- Triceps: responsible for the elbow extension at the top
- Trapezius: stabilises the shoulder girdle throughout the movement
- Pectorals: assist in the pressing phase
- Core muscles (abdominals and lower back): maintain body alignment in the inverted position
Mastering this exercise brings significant benefits in terms of strength, stability and body control. It is particularly useful for CrossFit athletes, gymnasts and advanced calisthenics practitioners.
The ideal starting position for the HSPU
A correct starting position is critical for executing a handstand push-up safely and effectively. Here are the key points:
- Place your hands on the floor, slightly wider than shoulder width.
- Spread your fingers wide for better stability.
- Align your body from head to toes, keeping your legs straight and together.
- Engage your core to maintain a straight position and avoid hyperextending your back.
- Fix your gaze on a point on the floor between your hands to maintain balance.
For beginners, it is recommended to start against a wall to build confidence and stability.
The 7 steps to progress towards the handstand push-up
Mastering the handstand push-up requires methodical progression. Here are the 7 key stages:
Shoulder and tricep strengthening
Start with foundational exercises like classic push-ups and military presses to build the necessary strength.
Handstand mastery
Learn to hold a stable handstand against a wall before attempting the HSPU. Aim for 60 seconds of hold time.
Pike push-ups
This exercise simulates the HSPU movement with your feet on the floor or elevated, reducing the load on the shoulders. Set up in a push-up position, raise your hips to form an inverted V, bend your elbows to bring the top of your head towards the floor, then push back up.
Negative HSPU
Slowly descend from the handstand position, controlling the movement throughout. Use your legs to help you push back up if needed. Focus on a 3 to 5 second descent.
Partial HSPU
Use blocks or books to limit the range of motion and progress gradually. As you gain strength, reduce the height of the blocks until you reach full range.
Full HSPU against a wall
Perform the complete exercise using the wall as support. Full range of motion, controlled descent and powerful push back to the top.
Freestanding HSPU
The final stage consists of executing the movement without any support, demanding perfect balance control on top of pure pressing strength.
From pike push-up to handstand hold
The pike push-up and the handstand hold are two important exercises in your progression towards the full HSPU.
The pike push-up specifically strengthens the muscles used in the HSPU while getting you accustomed to the inverted position:
- Get into a push-up position, then raise your hips to form an inverted V.
- Bend your elbows to bring the top of your head towards the floor.
- Push to return to the starting position.
The handstand hold develops the isometric endurance and balance needed for the HSPU:
- Get into a handstand position against a wall.
- Maintain the position by engaging your core and actively pushing into the floor.
- Aim for increasingly longer holds, starting with sets of 10 to 15 seconds.
These two preparatory exercises will help you develop the strength, control and confidence needed to progress towards the full HSPU.
Advanced techniques to perfect the HSPU
Once you have mastered the basics, you can refine your technique and increase the difficulty with these advanced methods:
- Deficit HSPU: Place your hands on parallettes or blocks to increase the range of motion.
- Paused HSPU: Hold at the lowest point for 2 to 3 seconds to eliminate momentum and build raw strength.
- HSPU in series: Chain multiple repetitions without coming down, working muscular endurance.
- One-arm HSPU: The ultimate challenge, reserved for the most advanced athletes, combining extreme strength and perfect balance.
For all these variations, it is essential to maintain impeccable technique and increase difficulty gradually.
Strict HSPU vs Kipping HSPU
In the world of CrossFit, there are two types of HSPU. Each has its own advantages.
| Criteria | Strict HSPU | Kipping HSPU |
|---|---|---|
| Strength development | Develops raw pushing strength | Less effective for pure strength gains |
| Injury risk | Lower risk when technique is correct | Higher risk if poorly executed |
| Repetitions | Limits the number of reps possible | Allows chaining more repetitions |
| Transfer | Positive transfer to other pressing movements | Useful in CrossFit WODs |
How to overcome common HSPU obstacles
Even with a methodical progression, you might encounter certain challenges. Here is how to overcome them:
1. Lack of strength
Intensify your shoulder and tricep strengthening with targeted exercises like military presses, dips and pike push-ups.
2. Balance problems
Practise the handstand hold regularly to improve your stability. Focus on shoulder taps and wall walks.
3. Fear of inversion
Start with simpler inversion exercises like the headstand to get comfortable with being upside down. Use a wall for safety.
4. Wrist pain
Strengthen your wrists with specific exercises (rotations, stretches, progressive loading) and make sure your hand placement technique is correct.
5. Progression plateau
Vary your training and incorporate complementary exercises to stimulate your muscles differently. Deficit and paused variations can help break through.
Do not hesitate to consult a qualified coach if you encounter persistent difficulties. A personalised analysis of your technique can make all the difference.
Targeted exercises to improve the HSPU
Integrate these exercises 2 to 3 times per week for optimal results.
| Exercise | Target | Why it helps |
|---|---|---|
| Military press | Shoulders, triceps | Directly strengthens the pressing muscles |
| Dips | Triceps, pectorals | Essential for the push phase |
| Hollow body hold | Core | Improves core stability, crucial for alignment |
| Handstand shoulder taps | Shoulders, core | Develops strength and stability in the inverted position |
| Wall walks | Shoulders, core | Strengthens shoulders while improving inverted control |
Integrating the HSPU into your training routine
To get the most out of the handstand push-up, it is essential to integrate it wisely into your training program:
- Frequency: Practise the HSPU or its variations 2 to 3 times per week, leaving at least one rest day between sessions.
- Volume: Start with 3 to 5 sets of 3 to 5 reps, depending on your level. Gradually increase the volume over the weeks.
- Progression: Alternate between sessions focused on technique and others focused on strength or endurance.
- Complementarity: Combine the HSPU with other push exercises (push-ups, dips) for balanced development.
- Recovery: Pay particular attention to shoulder recovery to avoid overtraining.
Remember to adapt your program based on your specific goals and current level. If you are new to calisthenics, it may be wise to start with more basic exercises before tackling the HSPU.
Warm-up and recovery for the HSPU
A proper warm-up and adequate recovery are essential for practising the HSPU safely and optimising your progress.
Warm-up
- Wrist mobilisation: rotations and gentle stretches
- Shoulder activation: arm rotations and band pull-aparts
- Core warm-up: planks and hollow body rocks
- Specific preparation: pike push-ups and short handstand holds
Recovery
- Shoulder and upper back stretches
- Self-massage of the trapezius and deltoids with a massage ball
- Mobility exercises for the wrists and shoulders
- Adequate rest between sessions (at least 48 hours)
A progressive warm-up prepares your body for the intense effort of the HSPU, while proper recovery promotes muscle regeneration and prevents injuries.
Safety and injury prevention
The handstand push-up is a demanding exercise that can carry risks if poorly executed. Here are the essential precautions:
- Master the basics: Make sure you have a solid base in strength and balance before attempting the full HSPU.
- Progress gradually: Do not skip stages. Each phase is important for developing strength and control.
- Impeccable technique: Maintain correct body alignment and avoid sudden or uncontrolled movements.
- Use the wall: For beginners, the wall provides safe support. Use it until you have gained confidence and stability.
- Appropriate equipment: A mat or Abmat can protect your head in case of a fall. Wrist wraps can relieve pressure on the joints.
- Listen to your body: Stop immediately if you feel sharp or unusual pain.
- Supervision: If possible, practise under the supervision of a qualified coach, especially at the beginning.
HSPU vs other shoulder exercises
The HSPU is impressive, but is it the best fit for your goals? Here is a comparison.
| Exercise | Advantages | Disadvantages |
|---|---|---|
| HSPU | Develops strength, balance and body control. Very effective for deltoid hypertrophy. | Complex technique, injury risk if poorly executed. |
| Military press | Easier to learn, allows working with heavy loads. | Less core engagement, no balance work. |
| Pike push-up | Good HSPU alternative, more accessible for beginners. | Less intense than the full HSPU. |
| Lateral raises | Effectively isolates the lateral deltoids. | Less functional, does not develop overall strength. |
The choice depends on your goals, your level and your preferences. For complete development, it is wise to combine several of these exercises.
Key takeaways for mastering the handstand push-up
The handstand push-up is a significant challenge, but with a methodical approach and perseverance, it is within reach for many athletes. Here are the essential points:
- Gradual progression: Follow the progression steps to build a solid base.
- Technique first: Perfect execution prevents injuries and optimises results.
- Patience and consistency: Mastering the HSPU takes time and regular practice.
- Balanced training: Combine the HSPU with other exercises for harmonious development.
- Safety: Never forget the safety precautions, especially at the start of your learning.
Whether you are a calisthenics enthusiast, a CrossFitter or simply looking for new challenges, the handstand push-up will bring a new dimension to your training.
Related guides: Handstand, Headstand, Hollow Hold, Push-ups, Start calisthenics.