Skills
How to Master the Elbow Lever Step by Step
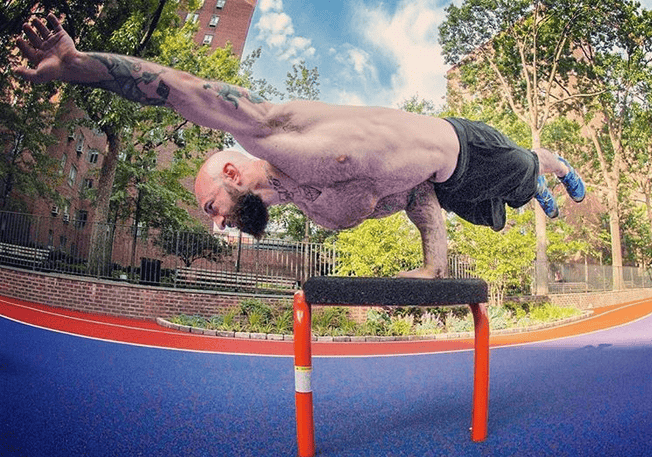
The elbow lever is an iconic calisthenics figure that combines strength, balance and technique. In this impressive position, your body is held parallel to the floor while resting on your elbows. Whether you are a beginner or an intermediate practitioner, this guide covers every step towards mastering it.
Fundamentals of the elbow lever
The elbow lever, also called an elbow planche, is a static figure that demands a combination of strength, balance and body control. This position primarily targets the shoulders, abdominals and back, while also testing your stability and proprioception.
Main muscles involved
To perform an effective elbow lever, several muscle groups work in synergy:
- Anterior deltoid: stabilises and supports the torso
- Triceps brachii: ensures arm stability
- Pectoralis major: contributes to maintaining the position
- Serratus anterior: participates in shoulder stabilisation
- Abdominals and lumbar muscles: brace the body and maintain alignment
- Glutes: help with overall body balance
This comprehensive muscular engagement makes the elbow lever a particularly interesting exercise for developing functional strength and muscular coordination.
Perfect elbow lever technique
Mastering the technique is paramount for performing a correct and safe elbow lever. Here are the key elements for perfect execution:
Optimal elbow and hand position
The placement of your elbows and hands is critical for success:
Hand position: Place your hands on the floor, spread to shoulder width. Your fingers can point slightly outward for better stability.
Elbow placement: Position your elbows just above your hips, against your abdominals. This placement is what allows you to support your weight effectively.
Once in position, engage your abdominals and glutes to keep your body straight. Your gaze should be directed at the floor, slightly in front of you, to maintain natural spinal alignment.
Preparatory exercises
Before attempting the elbow lever, it is essential to prepare your body with specific exercises:
Hand planks (30-60 seconds)
Strengthen your wrists and shoulders by holding planks on your hands. Focus on pushing the floor away and keeping your body in a straight line. Goal: 3 sets of 30 to 60 seconds.
Leg raises
Work your abdominals and back with controlled leg raise series. Lying on your back, lift your straight legs to 90 degrees and lower them slowly. Goal: 3 sets of 10 to 15 reps.
Frog stand
This position teaches you balance management on your hands and strengthens your shoulders. It is the closest preparatory exercise to the elbow lever. Goal: hold for 15 to 30 seconds.
Superman holds
This exercise strengthens the lumbar muscles and glutes, essential for keeping your legs horizontal during the elbow lever. Lying face down, lift your arms and legs simultaneously and hold. Goal: 3 sets of 15 to 20 seconds.
Once you have mastered these exercises, you can move on to practising the elbow lever itself.
Overcoming common difficulties
During the learning process, you will likely encounter certain obstacles. Here is how to overcome them:
The elbow slipping problem
Elbow slipping is a frequent difficulty that can compromise your stability. To fix it:
- Improve your placement: Make sure your elbows are firmly anchored against your abdominals, as close as possible to your centre of gravity.
- Strengthen your abdominals: Solid core bracing will help keep your elbows in place. The tighter your midsection, the more stable the shelf.
- Use a non-slip mat: At the beginning, a mat can help prevent slipping while you perfect your technique. Some practitioners also find that training in a long-sleeve shirt reduces skin friction issues.
Elbow lever variations to keep progressing
Once you have mastered the standard elbow lever, you can explore variations to continue improving:
Straight bar elbow lever
This variation demands more strength and control, as you must lift into position without the help of your feet. Grip a straight bar at about hip height, position your elbows against your abdomen and lever your body to horizontal. The reduced surface area makes balance significantly harder.
One-arm elbow lever
The ultimate challenge, requiring exceptional strength and balance. Start by training with minimal assistance from the second hand: place only your fingertips on the ground as support, then gradually reduce the help until you can hold on one arm alone.
These variations allow you to continue developing your strength and mastery of the movement.
Elbow lever vs other calisthenics skills
The elbow lever stands apart from other calisthenics figures through its unique combination of strength and balance. Here is how it compares to other popular movements:
| Skill | Difficulty | Primary Muscles | Specific Benefits |
|---|---|---|---|
| Elbow Lever | Intermediate | Shoulders, abs, back | Balance, core bracing, isometric strength |
| Back Lever | Advanced | Back, biceps, abs | Upper body strength, control |
| Front Lever | Very advanced | Back, lats, abs | Global strength, body control |
The elbow lever positions itself as an excellent intermediate figure, preparing the body for more advanced challenges like the back lever or the front lever.
The importance of mobility and flexibility
Mobility and flexibility play a very important role in performing the elbow lever. Good range of motion in the shoulders and wrists lets you position your elbows correctly and hold the position more easily.
Integrate these stretching exercises into your routine:
- Wrist stretches: Perform rotations and flexion/extension movements to improve joint mobility. On all fours, place your hands flat with fingers pointing towards your knees, then gently rock back and forth.
- Shoulder openers: Use a resistance band or towel to work on shoulder range of motion. Hold the band wide, pass it over your head and behind your back in a smooth arc.
- Back stretches: Cat-cow and gentle twists will help loosen your spine. These also improve your awareness of spinal position, which helps during the lever.
Regular practice of these stretches will improve your comfort and performance in the elbow lever.
Integrating the elbow lever into your training
Training structure
To progress efficiently, integrate the elbow lever in a structured way into your training routine:
- Frequency: Practice the elbow lever 2 to 3 times per week, leaving at least one rest day between each session.
- Volume: Start with 3 to 5 attempts of 5 to 10 seconds, and progressively increase the duration and number of repetitions.
- Progression: Alternate between the preparatory exercises, the classic elbow lever and its variations for a balanced progression.
- Recovery: Include mobility exercises and stretches after your sessions to promote recovery and prevent injuries.
Sample weekly integration
| Day | Focus | Elbow Lever Work |
|---|---|---|
| Monday | Upper body push | 5 x 5-10s holds after warm-up |
| Wednesday | Core and balance | 3 x max hold + preparatory exercises |
| Friday | Skill practice | Variations + hollow holds |
Key takeaways for a successful elbow lever
To master the elbow lever and reap all its benefits, keep these essential points in mind:
- Technique before strength: Focus on perfect placement before trying to hold the position for a long time. The right elbow position solves 80% of the difficulty.
- Gradual progression: Respect the learning stages and do not skip ahead. Each preparatory exercise builds a foundation for the next step.
- Consistency: Regular practice is the key to success. Even a few minutes per day can make a big difference over weeks.
- Listen to your body: Pay attention to your body's signals to avoid injuries and adapt your training. If your wrists or elbows ache, take a day off.
- Patience: Learning the elbow lever takes time. Celebrate every small bit of progress, from your first second off the ground to your first clean 10-second hold.
By applying these principles and following this guide, you will be able to master the elbow lever and open the door to even more advanced figures in your calisthenics journey. The elbow lever is an excellent stepping stone towards skills like the back lever, front lever and beyond.