Skills
How to master the Headstand
A proper headstand cannot be achieved without solid calisthenics foundations and a basic understanding of the tips, practical advice and contraindications involved. This traditional yoga posture tests your sense of balance and your strength.
What you need to know before learning the headstand
The headstand is a beneficial exercise for both body and mind, and you can achieve it fairly quickly after completing a preparatory warm-up and preliminary exercises. By following this guide and training at your own pace, you will progressively improve your ability to hold this posture.
What is the headstand?
The headstand, also known as the head balance or tripod headstand, is a popular gymnastics figure in the practice of yoga that offers multiple benefits. It is one of the most challenging exercises to master. This posture demands strength, balance and concentration.
The 5 benefits of the headstand
Also known as Sirsasana, considered the "king of all asanas" for its many benefits, the headstand offers numerous advantages:
Increased endurance and balance
By supporting your weight with your arms and balancing your body, you develop better muscular control and greater body awareness. Excellent for other physical activities and endurance sports.
Muscle strengthening
The headstand works several muscle groups: abdominals, back muscles, pectorals and glutes. With regular practice, you will strengthen all of these muscles.
Improved blood circulation
The headstand is an excellent exercise for engaging your circulatory system, stimulating digestion and promoting toxin elimination. The inversion improves blood flow to the brain.
Better posture
One of the first things you will notice after the first few weeks of practice is improved posture, thanks to the strengthening of the back and abdominal muscles.
Improved breathing
Practising the headstand requires good breathing. To maintain the posture, it is essential to control your breathing and focus your attention.
Prerequisites and contraindications
Before starting, this pose is not recommended if you have:
- Neck pain
- Eye diseases
- Cervical spine injuries
- Shoulder injuries or other contraindications
Strength prerequisites
Make sure you can meet these minimums before attempting the headstand:
| Exercise | Minimum hold |
|---|---|
| Forearm plank | 45 seconds |
| Boat pose | 30 seconds |
| Dolphin pose | 20 seconds |
4 preparatory exercises
Forearm plank
- Get into a plank position on your forearms
- Make sure your forearms are parallel, legs straight, body aligned
- Push your heels firmly backwards
- Tuck in your belly while keeping your back straight
- Hold this position for 3 x 30 seconds
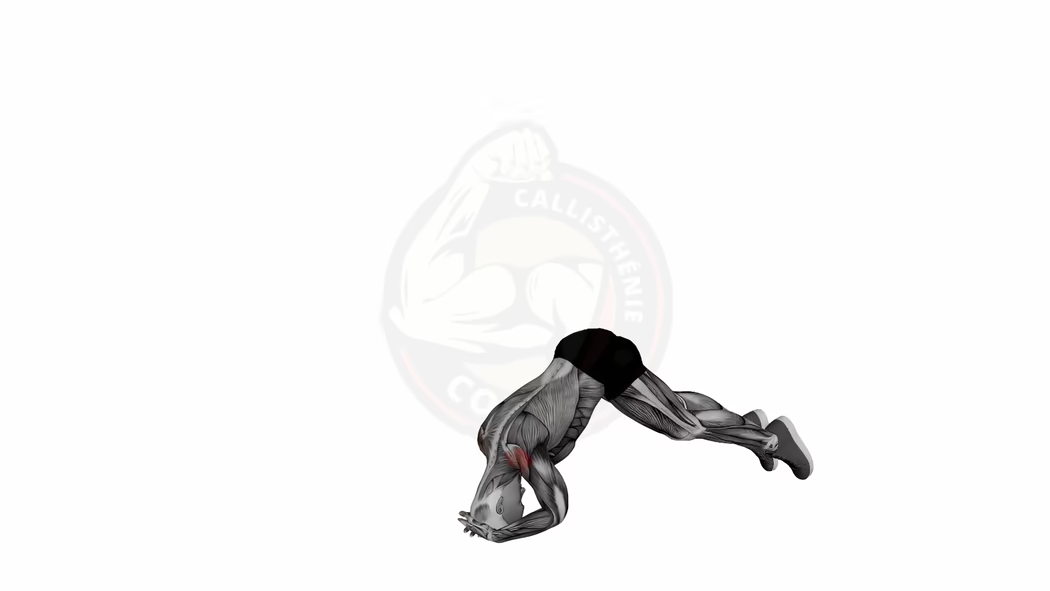
Dolphin pose
- Get on all fours on the floor
- Position your forearms with your palms interlaced
- Tuck your toes under you
- Lift your lower body to adopt a downward-facing dog position on your forearms
- Breathe calmly then lower back to the plank position
- Repeat this movement 7 to 10 times
Boat pose
- Sit on the floor
- Bend your knees towards your chest and lift your feet into the air
- Make sure your legs are as straight as possible
- Straighten up to prevent your back from rounding
- Extend your arms forward and hold the position for 3 x 25-30 seconds
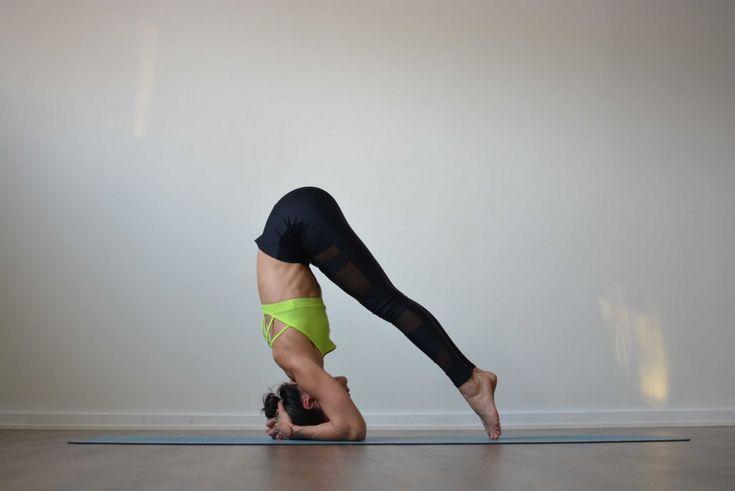
Child on head pose
- Join your two hands as if holding a tennis ball
- Get on all fours on your forearms with hands joined
- Place the top of your head on the floor at the base of your palms
- Make sure most of your weight is on your forearms
- Gradually bring your feet closer to your face
- Hold the position for 8 to 12 seconds
The 9 steps to perform a headstand
Follow these steps carefully, working near a wall for safety:
- Get into the child on head pose, near a wall (about 13 cm away).
- Start bringing your feet as close to your face as possible, until you almost feel like tipping over.
- Continue to press firmly on your forearms and outer wrists, and engage your core.
- From this position, slowly bring your knees above your hips.
- Then let your lower back come against the wall while seeking balance.
- Press firmly on your elbows and gently straighten your legs along the wall.
- Now extend your feet and tuck in your belly.
- Breathe deeply and remove your legs from the wall to find your midline.
- Try to hold this position for as long as you feel capable and safe.
Headstand training program (6 weeks)
Weeks 1-2: Preparation
| Exercise | Volume |
|---|---|
| Forearm plank | 3 x 30 seconds |
| Dolphin pose | 5 x 10 seconds |
| Boat pose | 3 x 20 seconds |
Frequency: 4 times per week
Weeks 3-4: Child on head pose
| Exercise | Volume |
|---|---|
| Child on head pose | 5 x 10 seconds |
| Toe-lift attempts | 3 x 5 seconds |
| Hollow hold | 3 x 15 seconds |
Weeks 5-6: Wall headstand
| Exercise | Volume |
|---|---|
| Full headstand against wall | 5 x 10-15 seconds |
| Freestanding attempts | Short holds (3-5 seconds) |
Final goal: 30 seconds against the wall
What comes after the headstand?
Once you have mastered the headstand (30 seconds without wall), progress towards:
The headstand is a yoga exercise that demands patience, strength and the courage to push beyond your comfort zone. Practise enough with the wall as support before performing it in open space.
Related guides: Handstand, Handstand Push-Ups, Hollow Hold, Start calisthenics.