Skills
Frog Stand (Crow Pose)
The frog stand is often the first hand-balance skill you'll learn in calisthenics. Knees resting on your triceps, feet off the ground: it looks simple, but it demands solid core strength, strong wrists and the ability to overcome the fear of tipping forward.
Why learn it? Because the frog stand directly prepares you for more advanced figures like the handstand and the tuck planche. It's a step you can't skip if you want to progress seriously in calisthenics.
Muscles worked during the frog stand
The frog stand mainly targets your upper body and core. Contrary to what you might think, it's not just about balance: you need real strength to hold the position.
Primary muscles
- Anterior deltoids (shoulders): they carry a large part of your bodyweight
- Triceps: stabilise your elbows and support the load
- Abs and obliques: keep your hips stable and prevent you from tipping over
Secondary muscles
- Pectorals: assist the shoulders in maintaining the position
- Wrist flexors: handle the constant micro-adjustments for balance
- Serratus anterior: stabilises the shoulder blades
If your shoulders are burning after a few seconds, that's perfectly normal. The frog stand is an excellent upper-body strength test, not just a balance exercise.
Prerequisites before you start
Before attempting your first frog stand, your body needs to be ready. Without the basics of strength and mobility, you'll either struggle for weeks or hurt your wrists.
Do you have the strength?
The frog stand is accessible, but not for a complete beginner. You should be able to:
- Do 10 strict push-ups with good form
- Hold a front plank for 30 seconds
- Support your bodyweight on your hands for 10 seconds without wrist pain
Wrist mobility
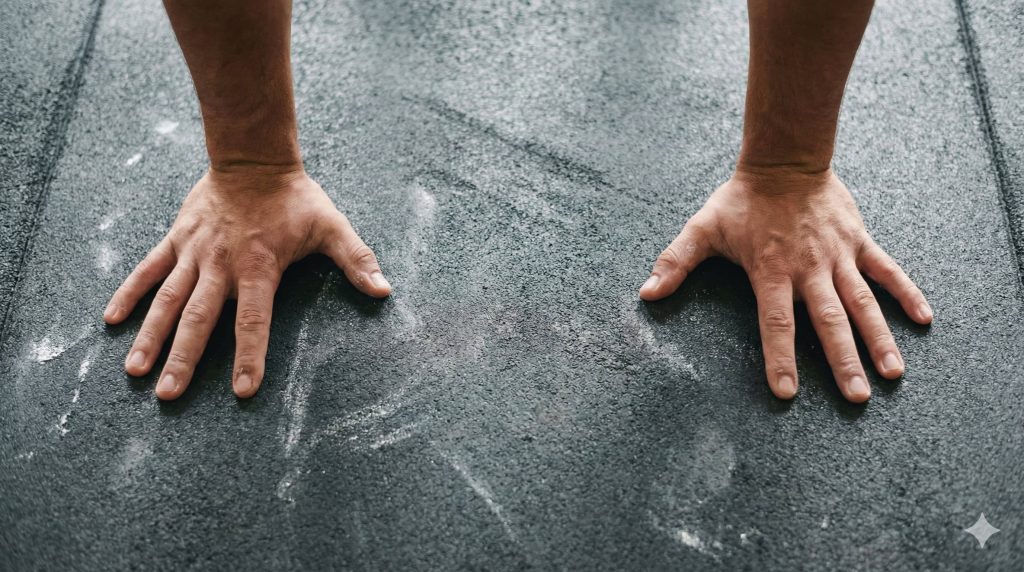
Your wrists are going to carry your entire bodyweight. If they lack mobility or strength, you'll feel pain and won't hold the position.
Simple test: Get on all fours, hands flat on the floor with fingers pointing forward. Shift your hips back towards your heels. If you feel strong tension or pain, your wrists aren't ready.
Exercises to improve mobility:
- Wrist rotations: 20 in each direction
- On all fours, make circles with your body while keeping your hands fixed: 10 per direction
- Wrist stretches against the floor (fingers pointing towards you): 30 seconds
Warm-up before every session
Before every frog stand attempt, warm up. It takes 3 minutes and saves you from injuries.
Quick routine:
- Wrist rotations: 30 seconds
- Shoulder rotations (arms extended): 30 seconds
- High plank hold: 20 seconds
- A few slow push-ups: 5 reps
How to do the frog stand step by step
The frog stand looks simple, but technique makes all the difference between holding 2 seconds and holding 30 seconds. Follow these steps in order.
Hand placement
Squat down and place your hands flat on the floor, slightly wider than shoulder width. Your fingers point forward or slightly outward: find what's comfortable for you.
Key point: Your hands must be far enough in front of your feet. If they're too close, you won't have room to lean forward.
Tip: Spread your fingers wide. It gives you more surface contact and more control for adjustments.
Knee placement
Bend your elbows slightly outward. Place your knees on the back of your arms, on the triceps just above the elbows. Some people prefer their knees directly on the elbows: test both.
Key point: Your knees must be firmly locked in, not resting in an unstable position. They serve as a support point, not just a contact point.
Common mistake: Placing the knees too high on the arms (towards the shoulders). You'll lose balance immediately.
Finding balance
This is where it happens. Lean slowly forward, transferring your weight onto your hands. Your feet will naturally lift off the ground once your centre of gravity passes over your hands.
The mental block: Fear of falling forward. It's normal. Place a cushion or pillow in front of you the first few times. Knowing you can fall without hurting yourself frees your brain.
Key point: You need to lean forward more than you think. The mistake is not leaning enough. Result: your feet never leave the ground.
Tip: Look at a spot on the floor 20-30 cm in front of your hands, not between your hands. It helps you lean forward enough.
Stabilise and hold
Your feet are off the ground. Now you need to hold.
Engage your core: Brace your abs as if you were about to take a punch. This is what stops your hips from collapsing.
Breathe: Many beginners hold their breath. Breathe normally, in a controlled way.
Micro-adjustments: Balance isn't static. Use your fingers to "catch" yourself if you tip forward, and your palms if you tip backward.
Beginner goal: Hold 3 to 5 seconds cleanly. Once you can do that consistently, aim for 10 seconds, then 15, then 30.
Common mistakes and how to fix them
Almost everyone makes the same mistakes at the beginning. Identifying them will save you weeks.
Not leaning forward enough
You're afraid of falling forward, so you stay back. Result: your feet never leave the ground.
Fix: Force your shoulders well past your hands. Place a cushion in front. The day you think "I'm going too far," you're probably in the right spot.
Elbows in the wrong position
If your elbows flare out or are too straight, your knees have no stable surface to rest on. You slip and lose balance.
Fix: Keep your elbows slightly bent and angled backward/outward. Your arms should form a solid "shelf" for your knees.
Core not engaged
If your abs are relaxed, your hips collapse and you tip over. The frog stand isn't just an arm exercise: it's a core exercise.
Fix: Before lifting your feet, brace your abs. Keep that contraction throughout. If you feel yourself losing it, rest and restart.
Wrists not warmed up
You jump straight into frog stand attempts without warming up your wrists. After 3 tries, you're in pain and give up.
Fix: Warm up your wrists every session (rotations, stretches, progressive loading). If pain persists, use parallettes: they place your wrists in a neutral position and reduce joint stress.
Complementary exercises
To progress faster, work on these exercises alongside your frog stand practice.
| Exercise | Target muscles | Why it helps |
|---|---|---|
| Push-ups | Shoulders, triceps, chest | Builds the pushing foundation |
| Front plank | Core, shoulders | Develops the necessary core stability |
| L-sit | Abs, hip flexors | Improves compression and control |
| Hollow body hold | Full core | Transfers directly to balance skills |
Training programs
Beginner program (4 weeks)
| Week | Goal | Volume |
|---|---|---|
| Week 1 | Find your balance | 3 sets of 3-5 seconds |
| Week 2 | Stabilise | 3 sets of 5-10 seconds |
| Week 3 | Hold longer | 3 sets of 10-15 seconds |
| Week 4 | Consolidate | 3 sets of 15-30 seconds |
Intermediate program (4 weeks)
| Week | Goal | Volume |
|---|---|---|
| Weeks 1-2 | Endurance | Hold 30 seconds, then 45 seconds |
| Weeks 3-4 | Transition | Add wall handstand work |
What comes after the frog stand?
You can hold your frog stand for 30 seconds without shaking? Well done, you have the basics. Now you can move on to more demanding skills.
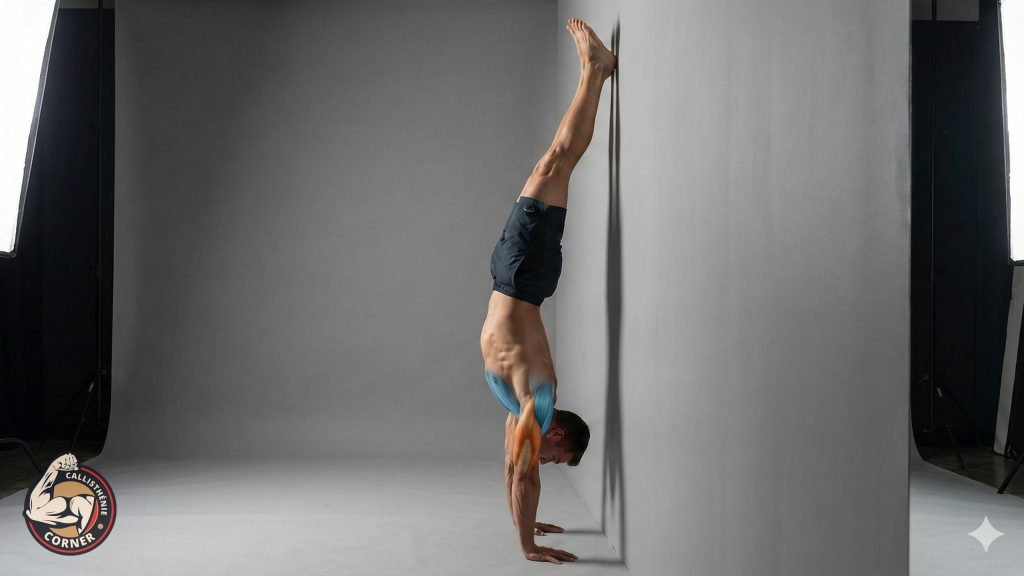
Handstand
The frog stand taught you to support your weight on your hands and handle micro-adjustments. The handstand is the next step: same logic, but vertical. You'll work against a wall before moving to a freestanding handstand.
Learn the handstand →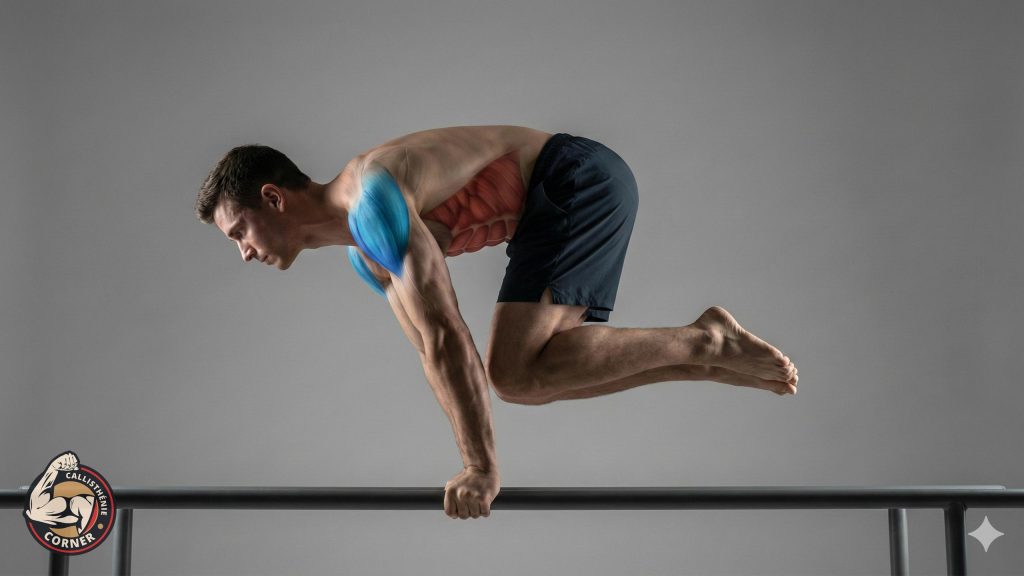
Tuck planche
The frog stand and tuck planche look similar, but the tuck planche is far more demanding. The difference: in tuck planche, your knees don't touch your arms. You hold purely through shoulder and core strength. If that's your goal, the frog stand is the perfect preparation.
Learn the tuck planche →Crane pose (advanced variation): It's a frog stand with straight arms instead of bent ones. Much harder because you lose the knee-on-elbow support. Save this for when you can hold a classic frog stand for 45-60 seconds.