Skills
How to achieve the Back Lever
The back lever is an iconic street workout and calisthenics skill that combines strength, flexibility and control. While this impressive position may seem reserved for experts, it is accessible to everyone with the right progression and rigorous preparation.
Muscles worked during the Back Lever
This movement highlights functional strength, engaging a wide range of upper body and trunk muscles while demanding precise postural control. By mastering it, you strengthen the posterior chain (lats, lower back, spinal erectors) as well as the stabiliser muscles, which are fundamental for overall body stability.
Whether you are a beginner, intermediate or advanced practitioner, this guide covers every step you need to progress safely and effectively.
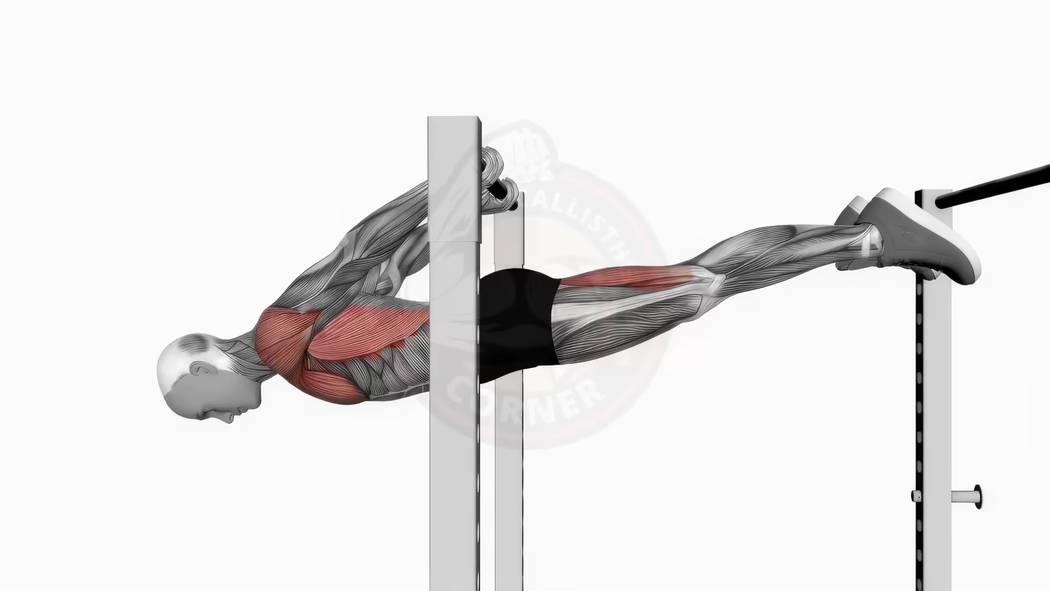
The back lever is a demanding skill that engages a wide range of muscles throughout the body. This muscular synergy is essential for maintaining the position, controlling the movement and avoiding imbalances. Here are the main muscle groups activated:
- Lats (latissimus dorsi)
- Rear deltoids (posterior shoulders)
- Biceps and triceps
- Pectorals
- Abs (full core engagement)
- Spinal erectors and lower back muscles
Importance of muscular synergy for the Back Lever
Success in the back lever relies on perfect synergy between several muscle groups, including the lats, deltoids, abs and lower back muscles. This coordination is essential for maintaining optimal body alignment.
An imbalance or weakness in any of these muscles can cause difficulty holding the position or lead to injuries. Working these muscle groups regularly through targeted exercises is crucial to progress and improve overall strength and stability.
Preparing for the Back Lever: essential prerequisites
Before starting to learn the back lever, it is important to make sure you have a solid base in strength and core control. Attempting this skill without adequate preparation can not only slow your progress but also expose you to injuries.
To succeed at the back lever, it is essential to develop the upper body strength and muscular control needed to maintain the position in suspension.
Building your base strength
The back lever engages the whole body, but it relies above all on upper body and trunk strength. To build this base, focus on the following exercises:
- Pull-ups: 8-10 strict reps minimum
- Dips: 8-10 clean reps
- Plank hold: 60 seconds minimum
- Skin the cat: To build shoulder mobility and get used to the inverted position
Beginner reinforcement program
Here is a reinforcement program for beginners that will help you develop the strength and control needed before tackling back lever progressions. This program is designed to be performed 3 to 4 times per week, alternating training and rest days.
| Exercise | Sets | Reps / Duration |
|---|---|---|
| Strict pull-ups | 3 | 8-10 |
| Dips | 3 | 8-10 |
| Plank hold | 3 | 60 sec |
| Skin the cat | 3 | 5-8 |
| Front lever tuck hold | 3 | 10-15 sec |
Important: Follow this program rigorously for 4 to 6 weeks to build a sufficient base of strength and control. Without this preparation, attempting the back lever can lead to injuries. A thorough warm-up is non-negotiable before every session.
How to perform the Back Lever: detailed progression steps
Tuck Back Lever
The tuck back lever is the first step towards the full movement. This tucked position reduces the lever arm and therefore the difficulty, by bringing your knees towards your chest.
How to execute:
- Starting position: Hang from a horizontal bar in an overhand grip (palms facing forward), hands shoulder-width apart.
- Movement: Bring your knees towards your chest while flexing at the hips, and slowly rotate backwards until you are upside down.
- Holding the position: Once your hips are aligned with your shoulders, try to keep your back parallel to the ground with your knees still tucked. Hold for 5 to 10 seconds at first, then gradually increase the duration.
Tips:
- Keep your elbows slightly bent to reduce joint stress.
- Strongly engage your abs and lats to stabilise the trunk.
- Breathe regularly and avoid holding your breath.
Straddle Back Lever
The straddle back lever is the intermediate step that brings you closer to the full movement. By spreading your legs, you reduce the load through a different weight distribution. This position requires more hip adductor flexibility but makes the horizontal hold easier.
How to execute:
- Starting position: Same as the tuck back lever, hang from the bar in an overhand grip.
- Movement: Slowly rotate backwards while keeping your legs straight, then spread them as wide as possible into a "V" shape.
- Holding the position: Align your body so that your back, hips and legs are parallel to the ground. Keep your toes pointed for better muscle activation.
Tips:
- Continue to strongly engage your core to stabilise the trunk.
- Make sure your shoulders stay retracted and depressed to protect the joints.
- If you lack flexibility, include adductor stretching exercises in your training.
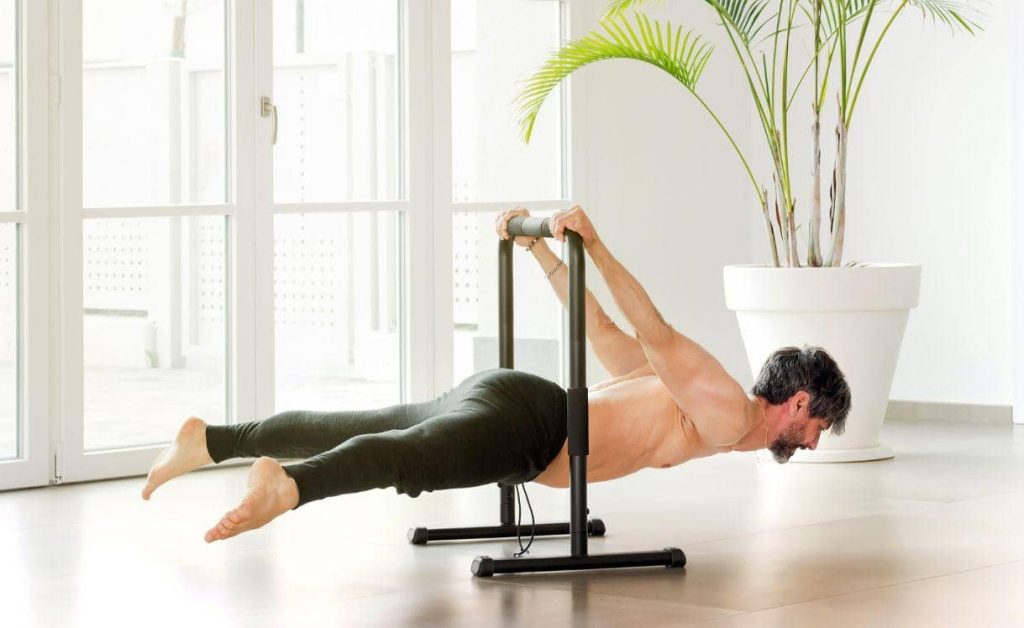
Full Back Lever
The full back lever is the complete version of the movement, where the body is fully aligned and horizontal, legs straight and together. This step requires significant strength and control to maintain the position with correct technique.
How to execute:
- Starting position: Hang from the bar in an overhand grip, hands slightly wider than shoulder width.
- Movement: Slowly rotate backwards keeping your legs straight and together. Lower until your body is parallel to the ground, maintaining a straight line from head to feet.
- Holding the position: Strongly contract all the engaged muscles: lats, abs, glutes and legs. Fix your gaze on a point in front of you to help with balance.
Tips:
- Core engagement: Essential to prevent the hips from sagging or the back from arching. Contract your abs throughout the movement.
- Breathing: Breathe deeply and regularly to maintain muscle oxygenation and avoid unnecessary tension.
- Trunk stability: Focus on maintaining body alignment. Any deviation can increase injury risk and make holding the position harder.
6-week Back Lever training program
To progress effectively, follow this structured program adapted to your level. It is split across 3 phases for beginners, intermediates and advanced practitioners.
Beginner program (Weeks 1-2)
Goal: Master the Tuck Back Lever
| Exercise | Sets | Reps / Duration |
|---|---|---|
| Tuck Back Lever Hold | 3 | 10 sec |
| Skin the cat | 3 | 5-8 reps |
| Plank hold | 3 | 60 sec |
| Superman | 3 | 12 reps |
| Shoulder stretches | 3 | 30 sec each |
Intermediate program (Weeks 3-4)
Goal: Progress to the Straddle Back Lever
| Exercise | Sets | Reps / Duration |
|---|---|---|
| Straddle Back Lever Hold | 4 | 8 sec |
| Tuck Back Lever (weighted) | 3 | 10 sec |
| Reverse plank | 3 | 45 sec |
| Wide pull-ups | 3 | 8-10 reps |
| Dynamic side plank | 3 | 12 reps each side |
Advanced program (Weeks 5-6)
Goal: Achieve the Full Back Lever
| Exercise | Sets | Reps / Duration |
|---|---|---|
| Full Back Lever Hold | 5 | 5 sec |
| Straddle Back Lever | 4 | 10 sec |
| Ring dips | 3 | 8-10 reps |
| Front lever tuck hold | 3 | 12 sec |
| Mobility work (shoulders, hips) | 3 | 30 sec each |
Rest and recovery
Rest is an essential component of any training program. It allows your muscles to repair and strengthen. Here are some tips:
- Active rest days: Practise light activities like walking or yoga to promote recovery without overloading the muscles.
- Sufficient sleep: Aim for 7 to 9 hours of sleep per night to optimise muscle recovery.
- Adapted nutrition: Make sure you have a diet rich in protein, complex carbohydrates and healthy fats to support your efforts.
Is the Back Lever dangerous? Safety tips
Like any advanced calisthenics skill, the back lever carries certain risks if practised without adequate preparation or with poor technique. By respecting the progressions and adopting good practices, it is entirely possible to minimise these risks.
Common errors to avoid
- Poor posture: An arched back or misaligned hips puts excessive strain on the shoulders and lower back.
- Insufficient core engagement: Without strong core bracing, you cannot maintain the position and risk injury.
- Bent arms: Keep your arms straight (or very slightly bent) to distribute the load correctly and protect your joints.
Injury prevention tips
- Specific warm-up before every session
- Shoulder rotations and arm circles
- Dynamic wrist stretches
- Dynamic reverse plank
- Shoulder and wrist mobility work
- Wall shoulder stretches
- Floor wrist stretches
FAQ about the Back Lever
Does the back lever work the pectorals?
Yes, although the pectoral engagement is less dominant than the lats, the back lever does work the pectorals secondarily to stabilise the arms and shoulders. Their engagement is essential for maintaining the position.
How often should you train for the back lever?
It is recommended to practise the back lever 2 to 3 times per week, making sure to include rest days for recovery. The remaining time can be dedicated to other aspects of training, such as core work or mobility.
How long does it take to master the back lever?
The time needed depends on several factors, including your current strength level, consistency and training quality. Generally, with dedicated practice and well-managed progressions, you can expect to achieve solid mastery in 3 to 6 months.
Summary of Back Lever progressions
| Stage | Reps / Duration | Sets | Muscles targeted |
|---|---|---|---|
| Tuck Back Lever | 10-15 sec | 3 | Lats, abs, deltoids |
| Straddle Back Lever | 8-10 sec | 3 | Lats, abs, adductors, deltoids |
| Full Back Lever | 5-8 sec | 5 | Lats, abs, pecs, triceps, lower back |
Mastering the back lever takes time, patience and a progressive approach. It is crucial to respect each step, strengthen the stabiliser muscles and never skip stages. Stay consistent in your efforts. Progression is often slow, but it is by respecting the fundamentals that you will achieve lasting mastery, safely.